

A Note from the Author: Our car seat poncho design has been our proud piece for many years, so please, our free car seat poncho tutorial is for personal use only (that means you can’t use this tutorial to make and sell them)! We are a women, mom and certified disabled veteran-owned business, so please share but be fair! Remember, if you get frustrated, end up throwing your sewing machine, DIY patterns aren’t your thing, or can’t make it for under $30 in supplies, then read our shameless plug: we sell them here! We hope you love our super simple and quick toddler car seat step by step tutorial!
After sewing, using & selling these adorable SAFE car seat ponchos for over half a decade, we decided to share our original recipe with you! This is where it all started for us. We designed and tested many versions of this poncho over the years and wanted something simple and effective. Now we laid out all the steps and took pictures so that you can make them yourself in our car seat poncho step by step tutorial guide; a very easy DIY project that you can perfect in about an hour.
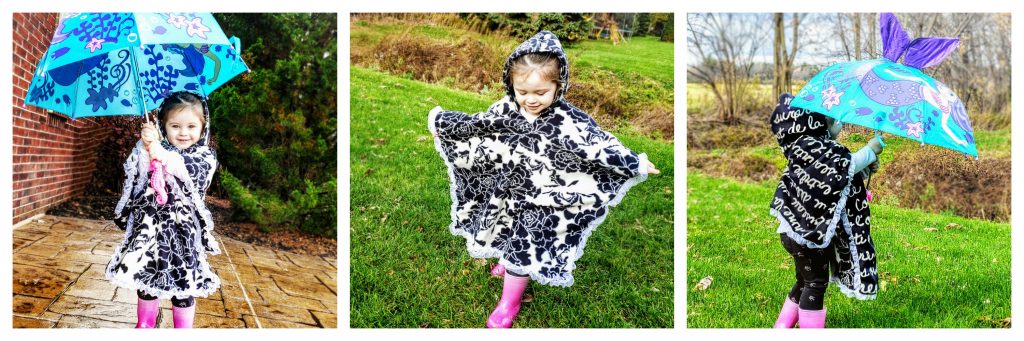
Once you make it, you will see how simple it is and you will be sewing these car seat ponchos for all your friends and family- think unique baby shower or birthday gifts, because what present is better than the gift of safety?! Just run to Joann Fabrics, pick up some fleece (wait for a 50% off sale for a low cost option) and get sewing! This fleece “coat” will keep your little boy or girl, baby or toddler, warm and cozy through fall, winter and spring. The options are endless, let your creativity soar!
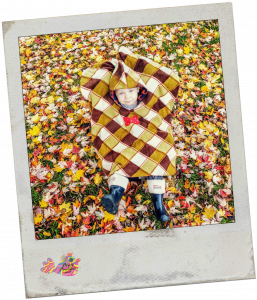
Wondering what all the buzz is about with car seat ponchos for little boys and girls? Safety! Did you know that you’re not supposed to buckle your child over a coat in their car seat? That’s because bulky coats can add 4 dangerous inches of slack into the harness straps between the child and harness, interfering with safety in the event of a car accident. The car seat poncho is recommended by a variety of car seat safety organizations as a safer way for kids to travel. Read our car seat safety blog here for lots more information on the dangers of coats and benefits of car seat ponchos to keep your littles warm and safe. Now, let’s get going (and sewing!)
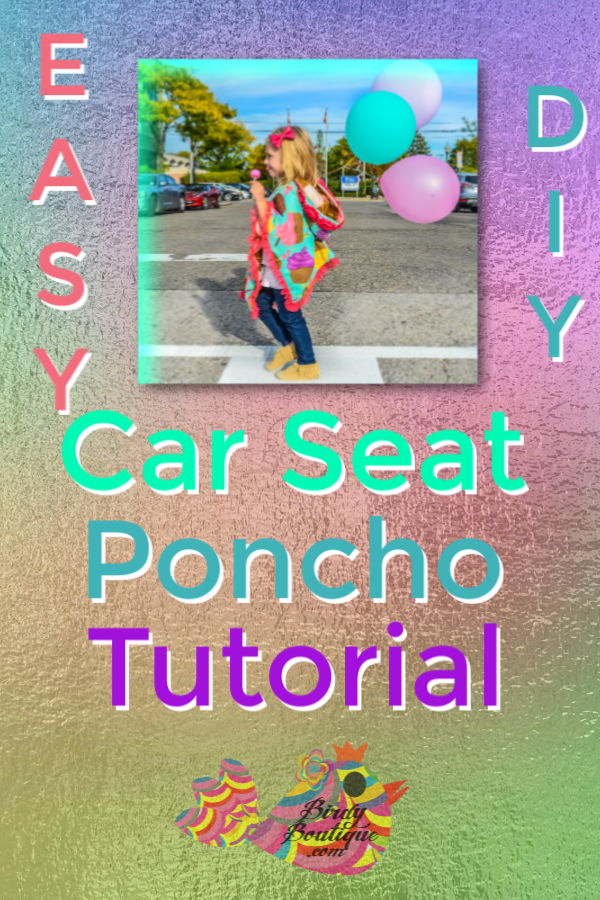
DIY Car Seat Poncho Tutorial 2021
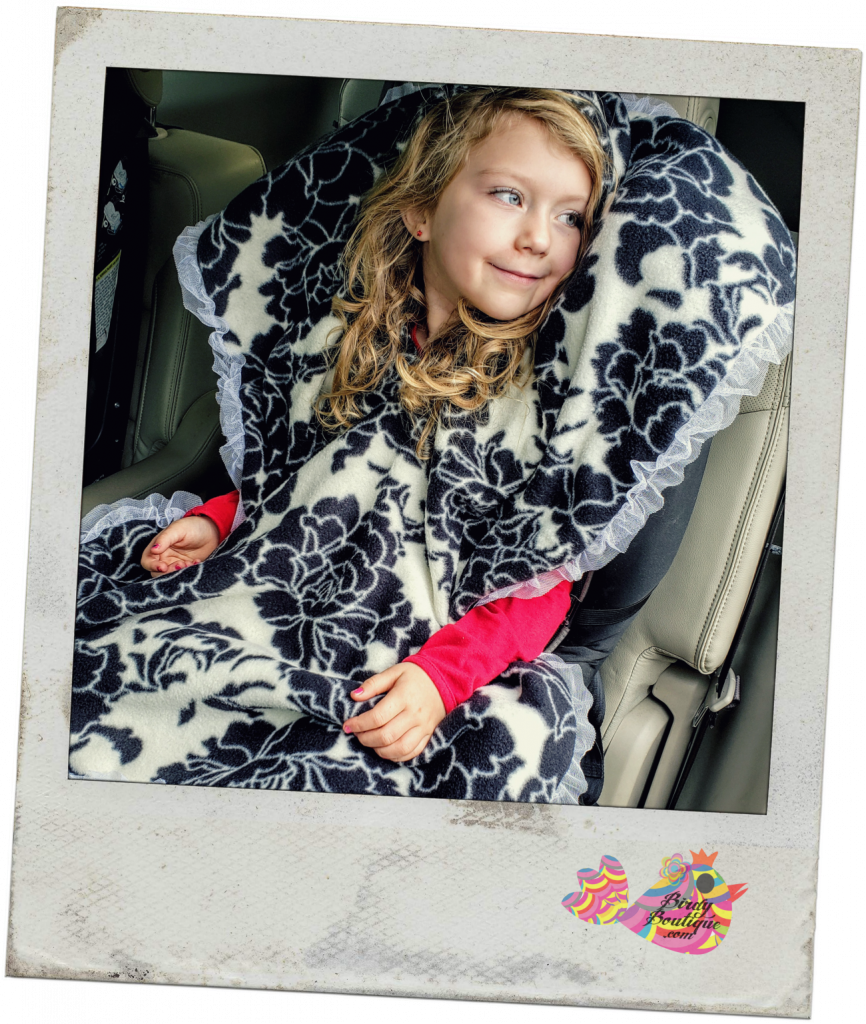
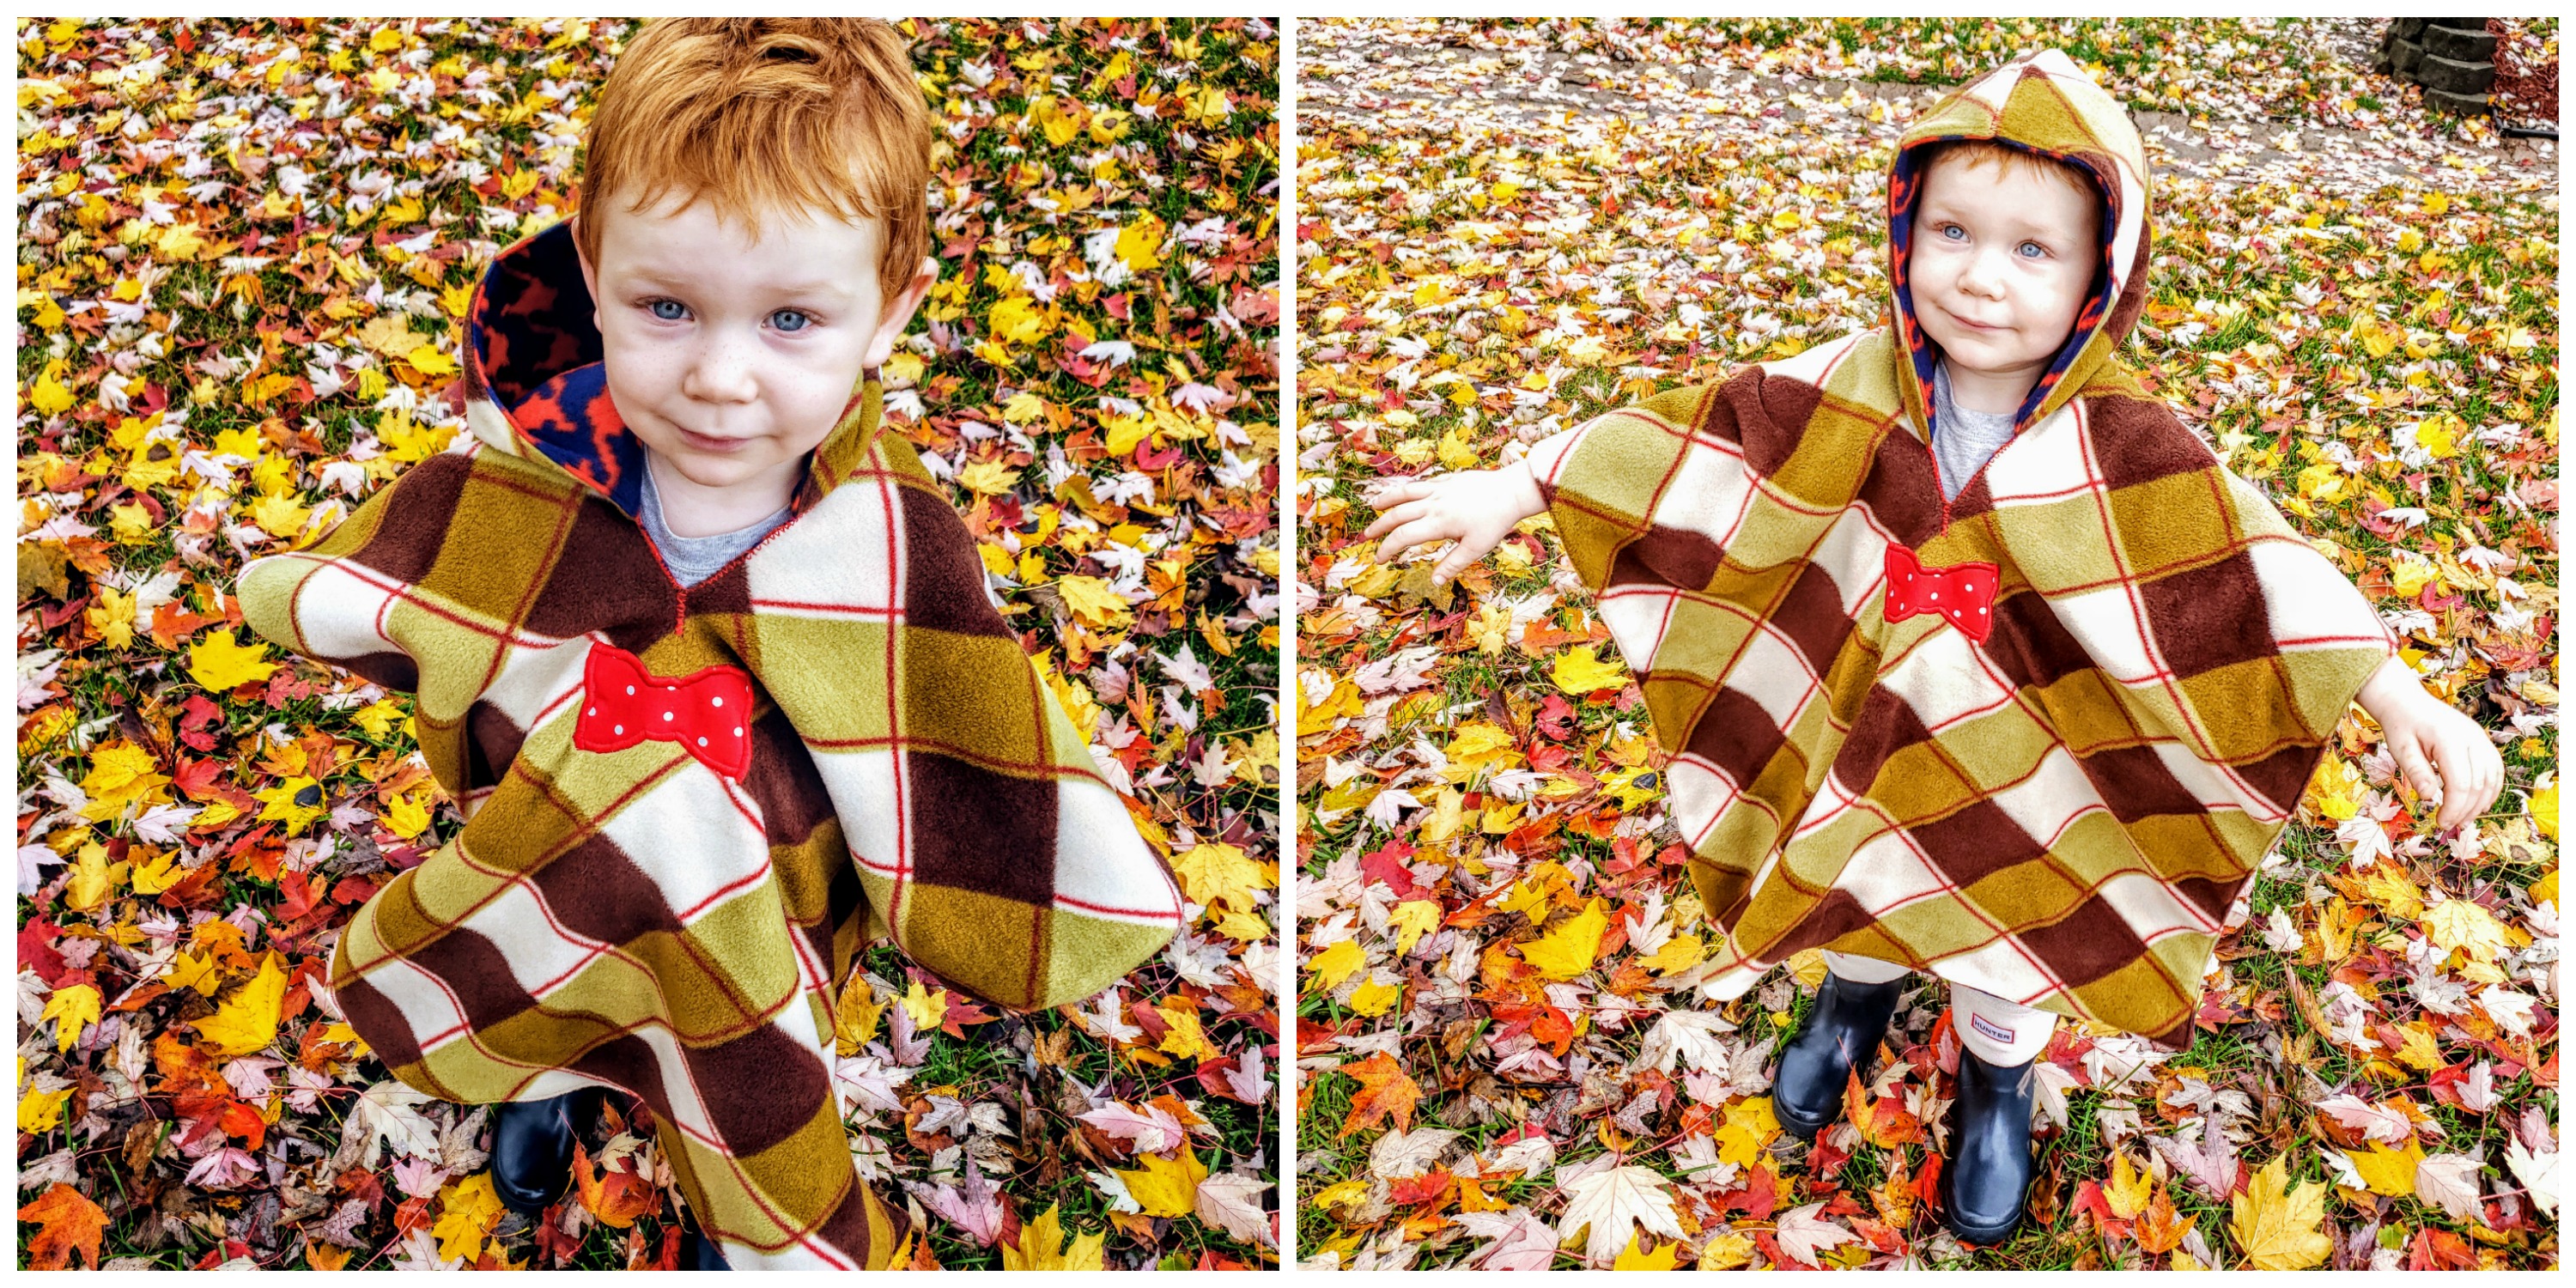
You have several choices in this tutorial and all options are cozy warm, double-layered and reversible. The sizing of this poncho is meant for a 6 month old to a 3 year old. Our own kids started with these in car seats and strollers and then wore them out and about walking and running.
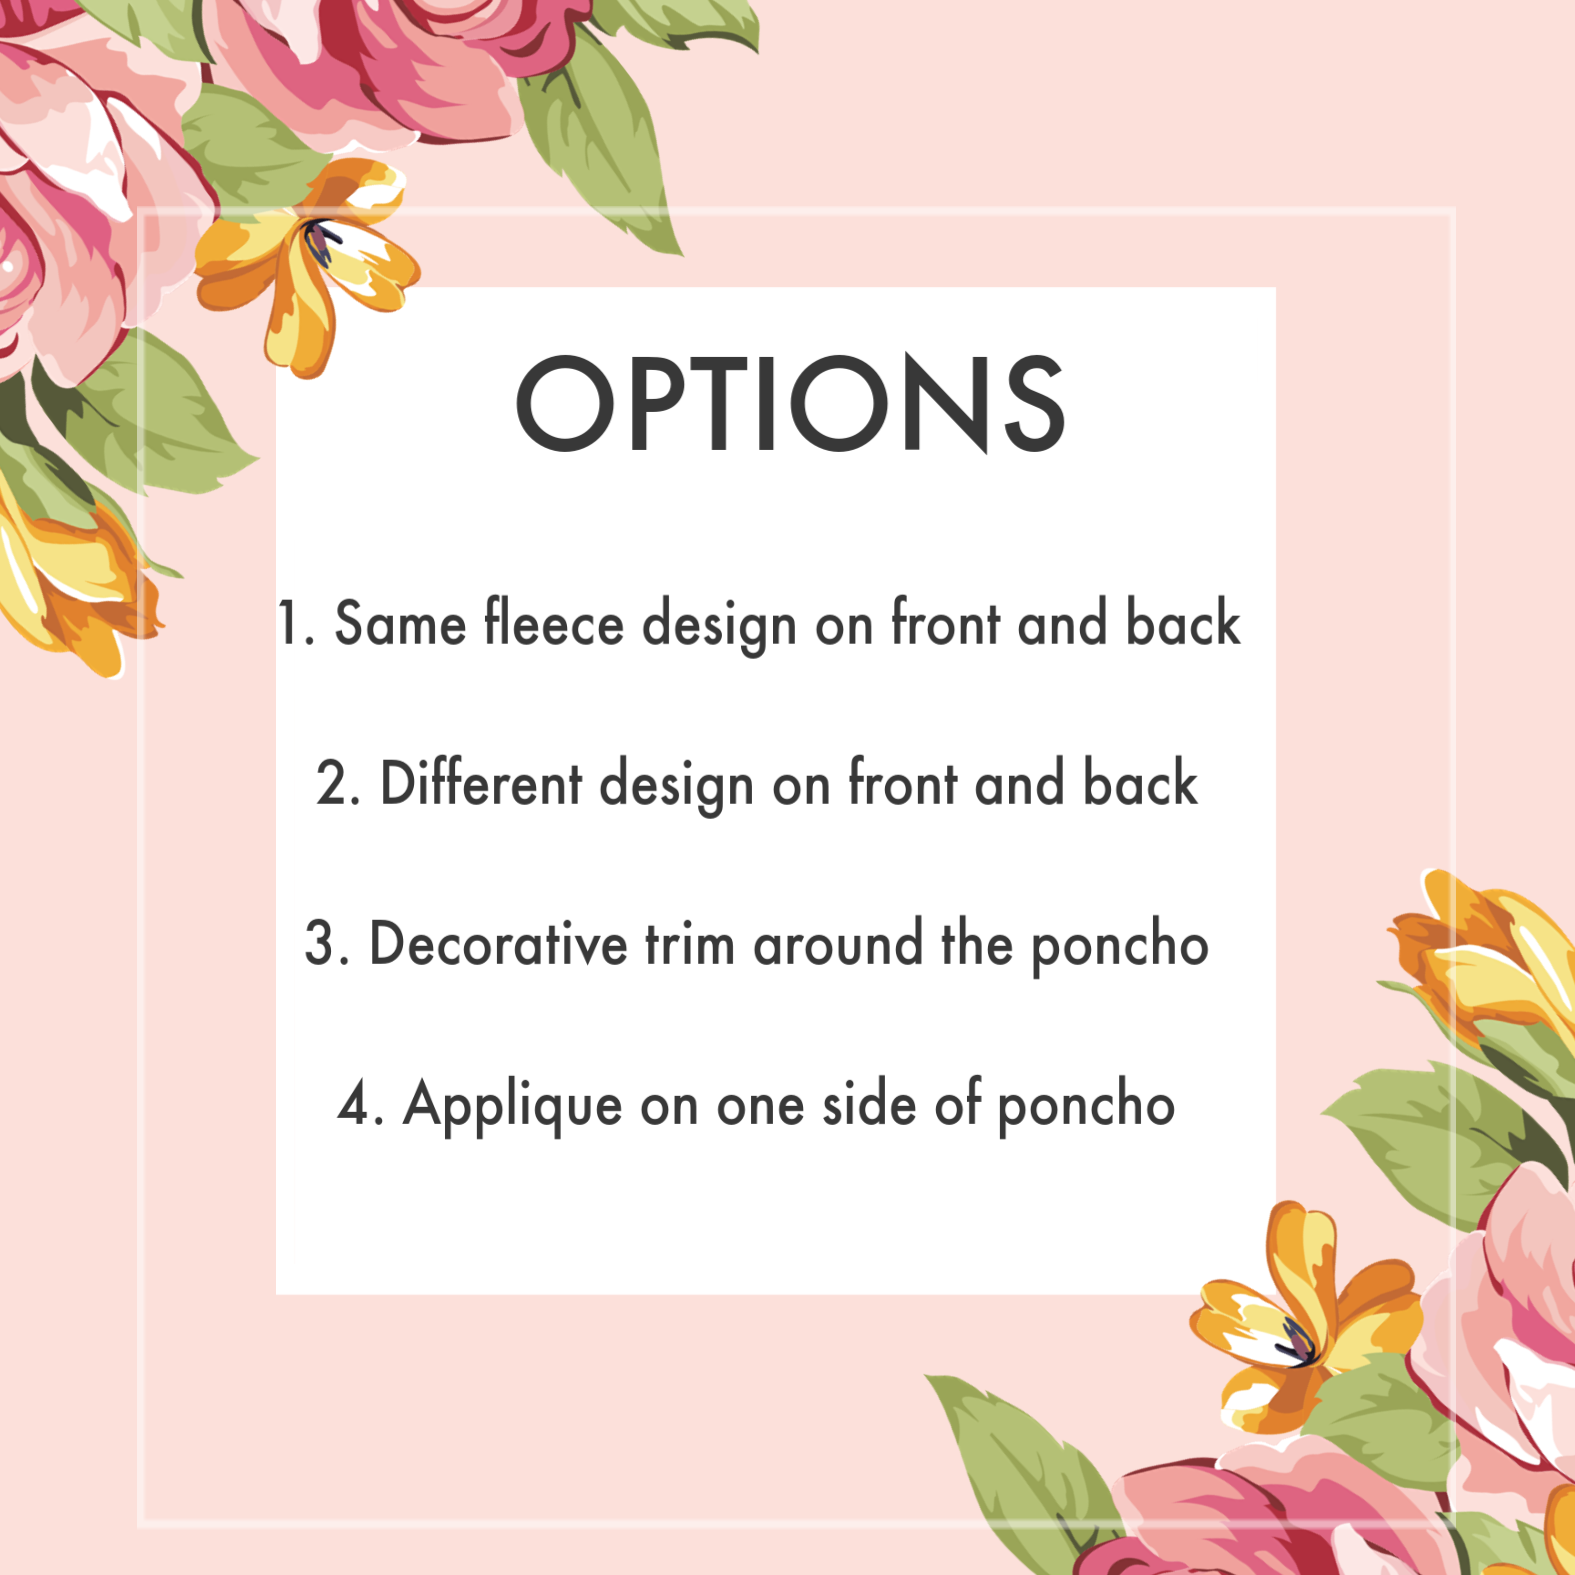
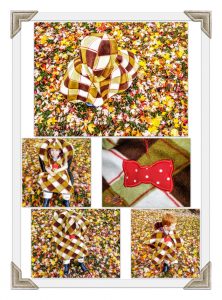
We usually choose a simple pattern for one side and a more busy pattern for the other. For example, a girl poncho might have pretty, large flowers on one side and a simple neutral argyle print (color coordinated to the flowers) on the other. This version of the car seat poncho is shorter in the back than in the front so that it can be flipped over the back of the car seat easier. If you would like your length to be the same in front and back, just lengthen the body piece when you are cutting!
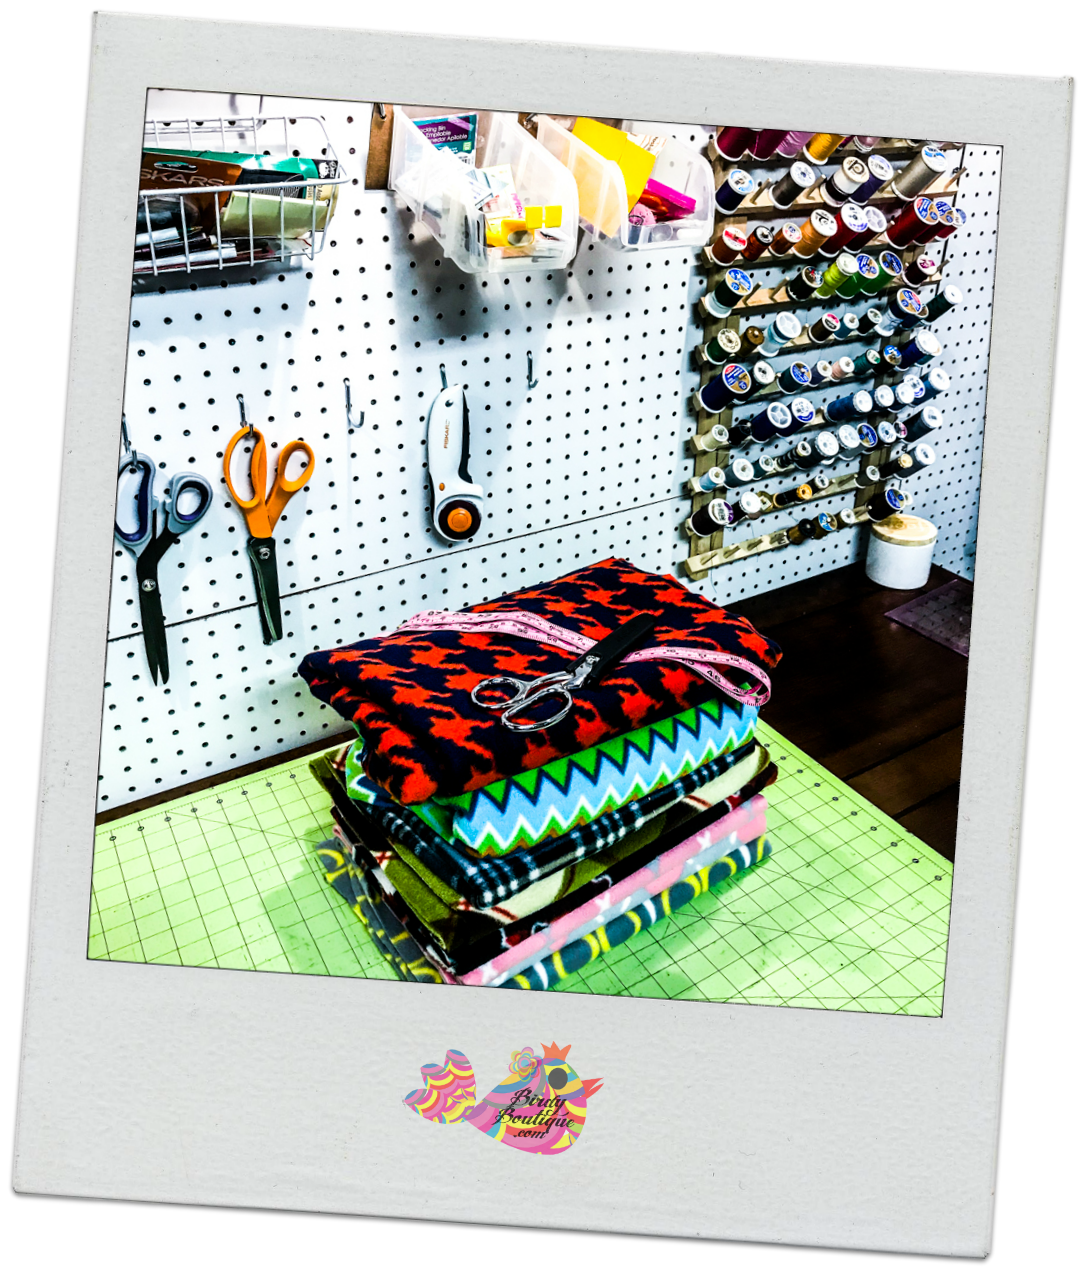
Step 1. Gather Supplies
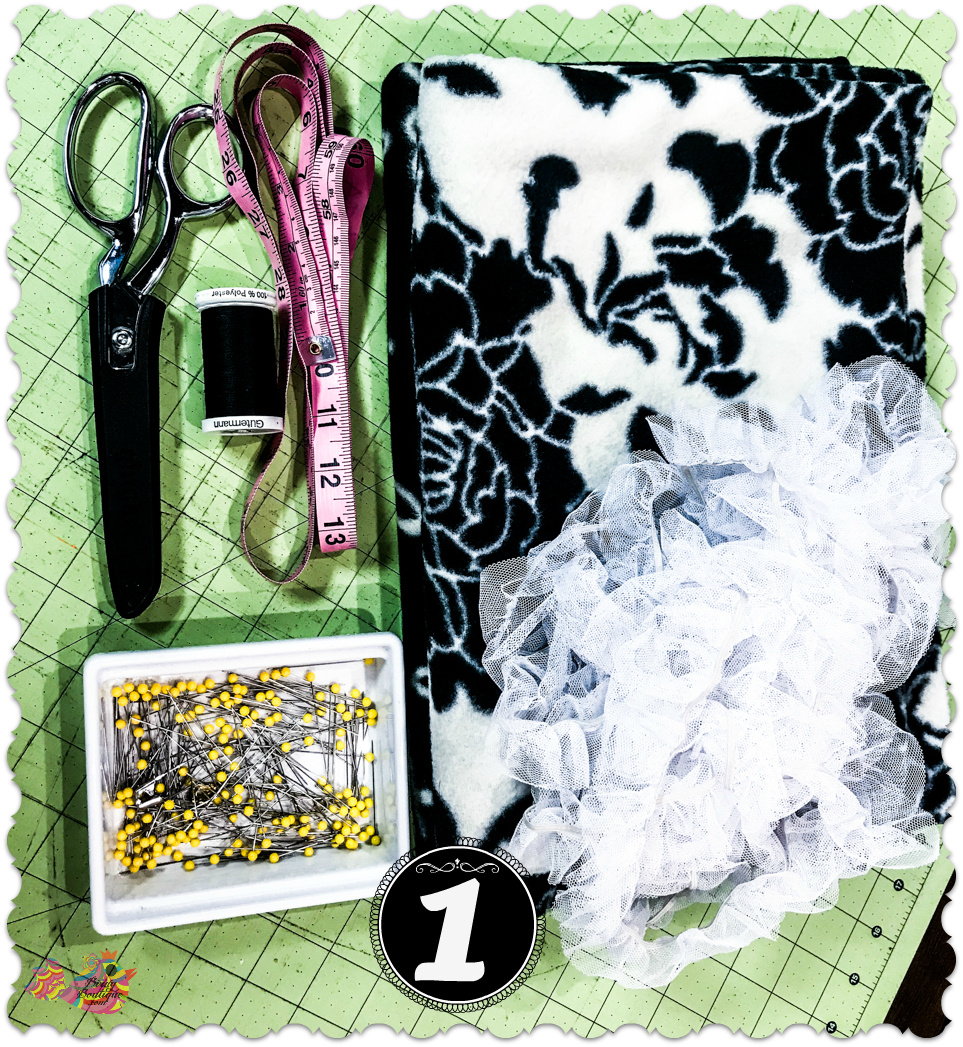
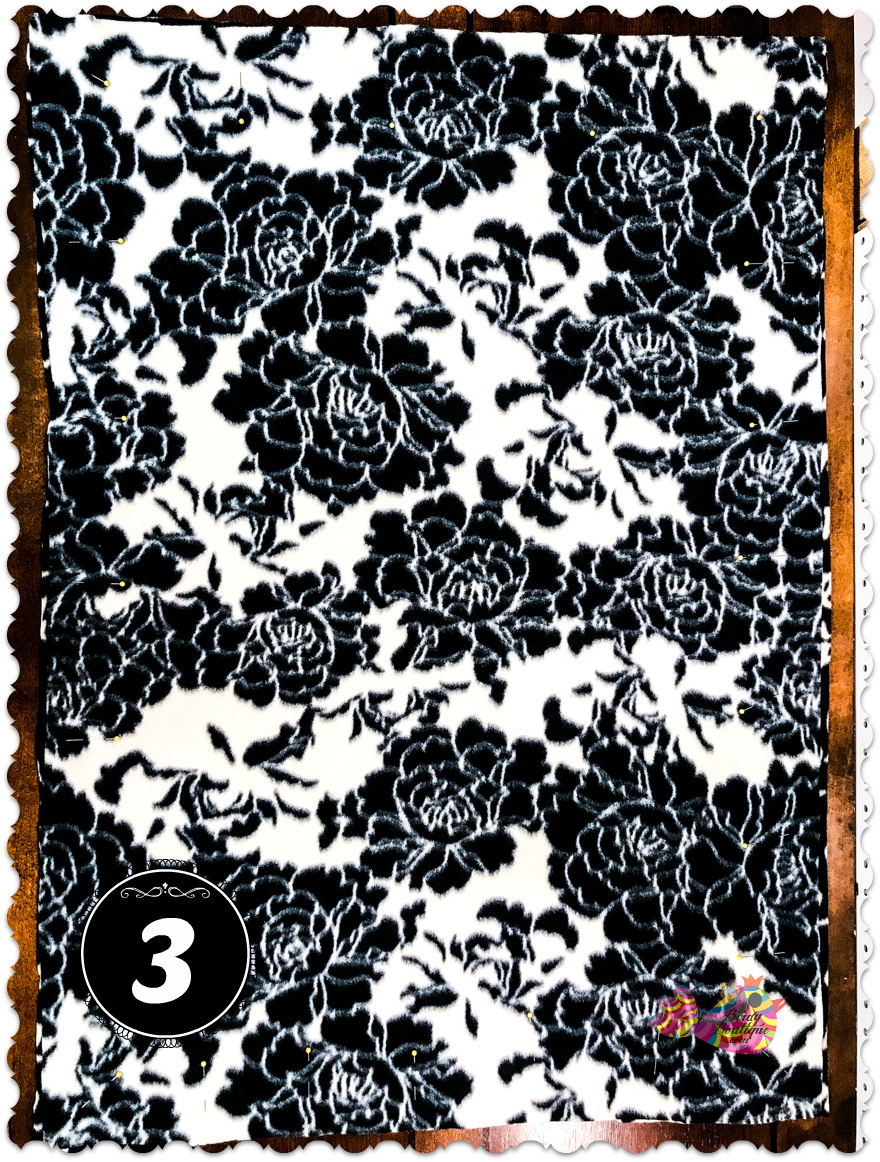
- 2 rectangular pieces of fleece 38in x 28in; choose 2 different prints if you want the reverse to be different (about 1.5 yards total)
- 4 hood pieces of fleece 10in x 11in; if choosing different prints, make 2 hood pieces of each print (We love JoAnn Fabrics, amazing coupons!)
- Scissors and rotary cutter (optional)
- Sewing machine
- Matching thread
- Pins
- Ruler or measuring tape
- Hood pattern [Email us for PDF Download here]
- Decorative trim (optional) (about 4.5 yards)
- Decorative applique fabric (optional)
- Bow Tie pattern (optional)
Step 2. Cut Out Body Pieces
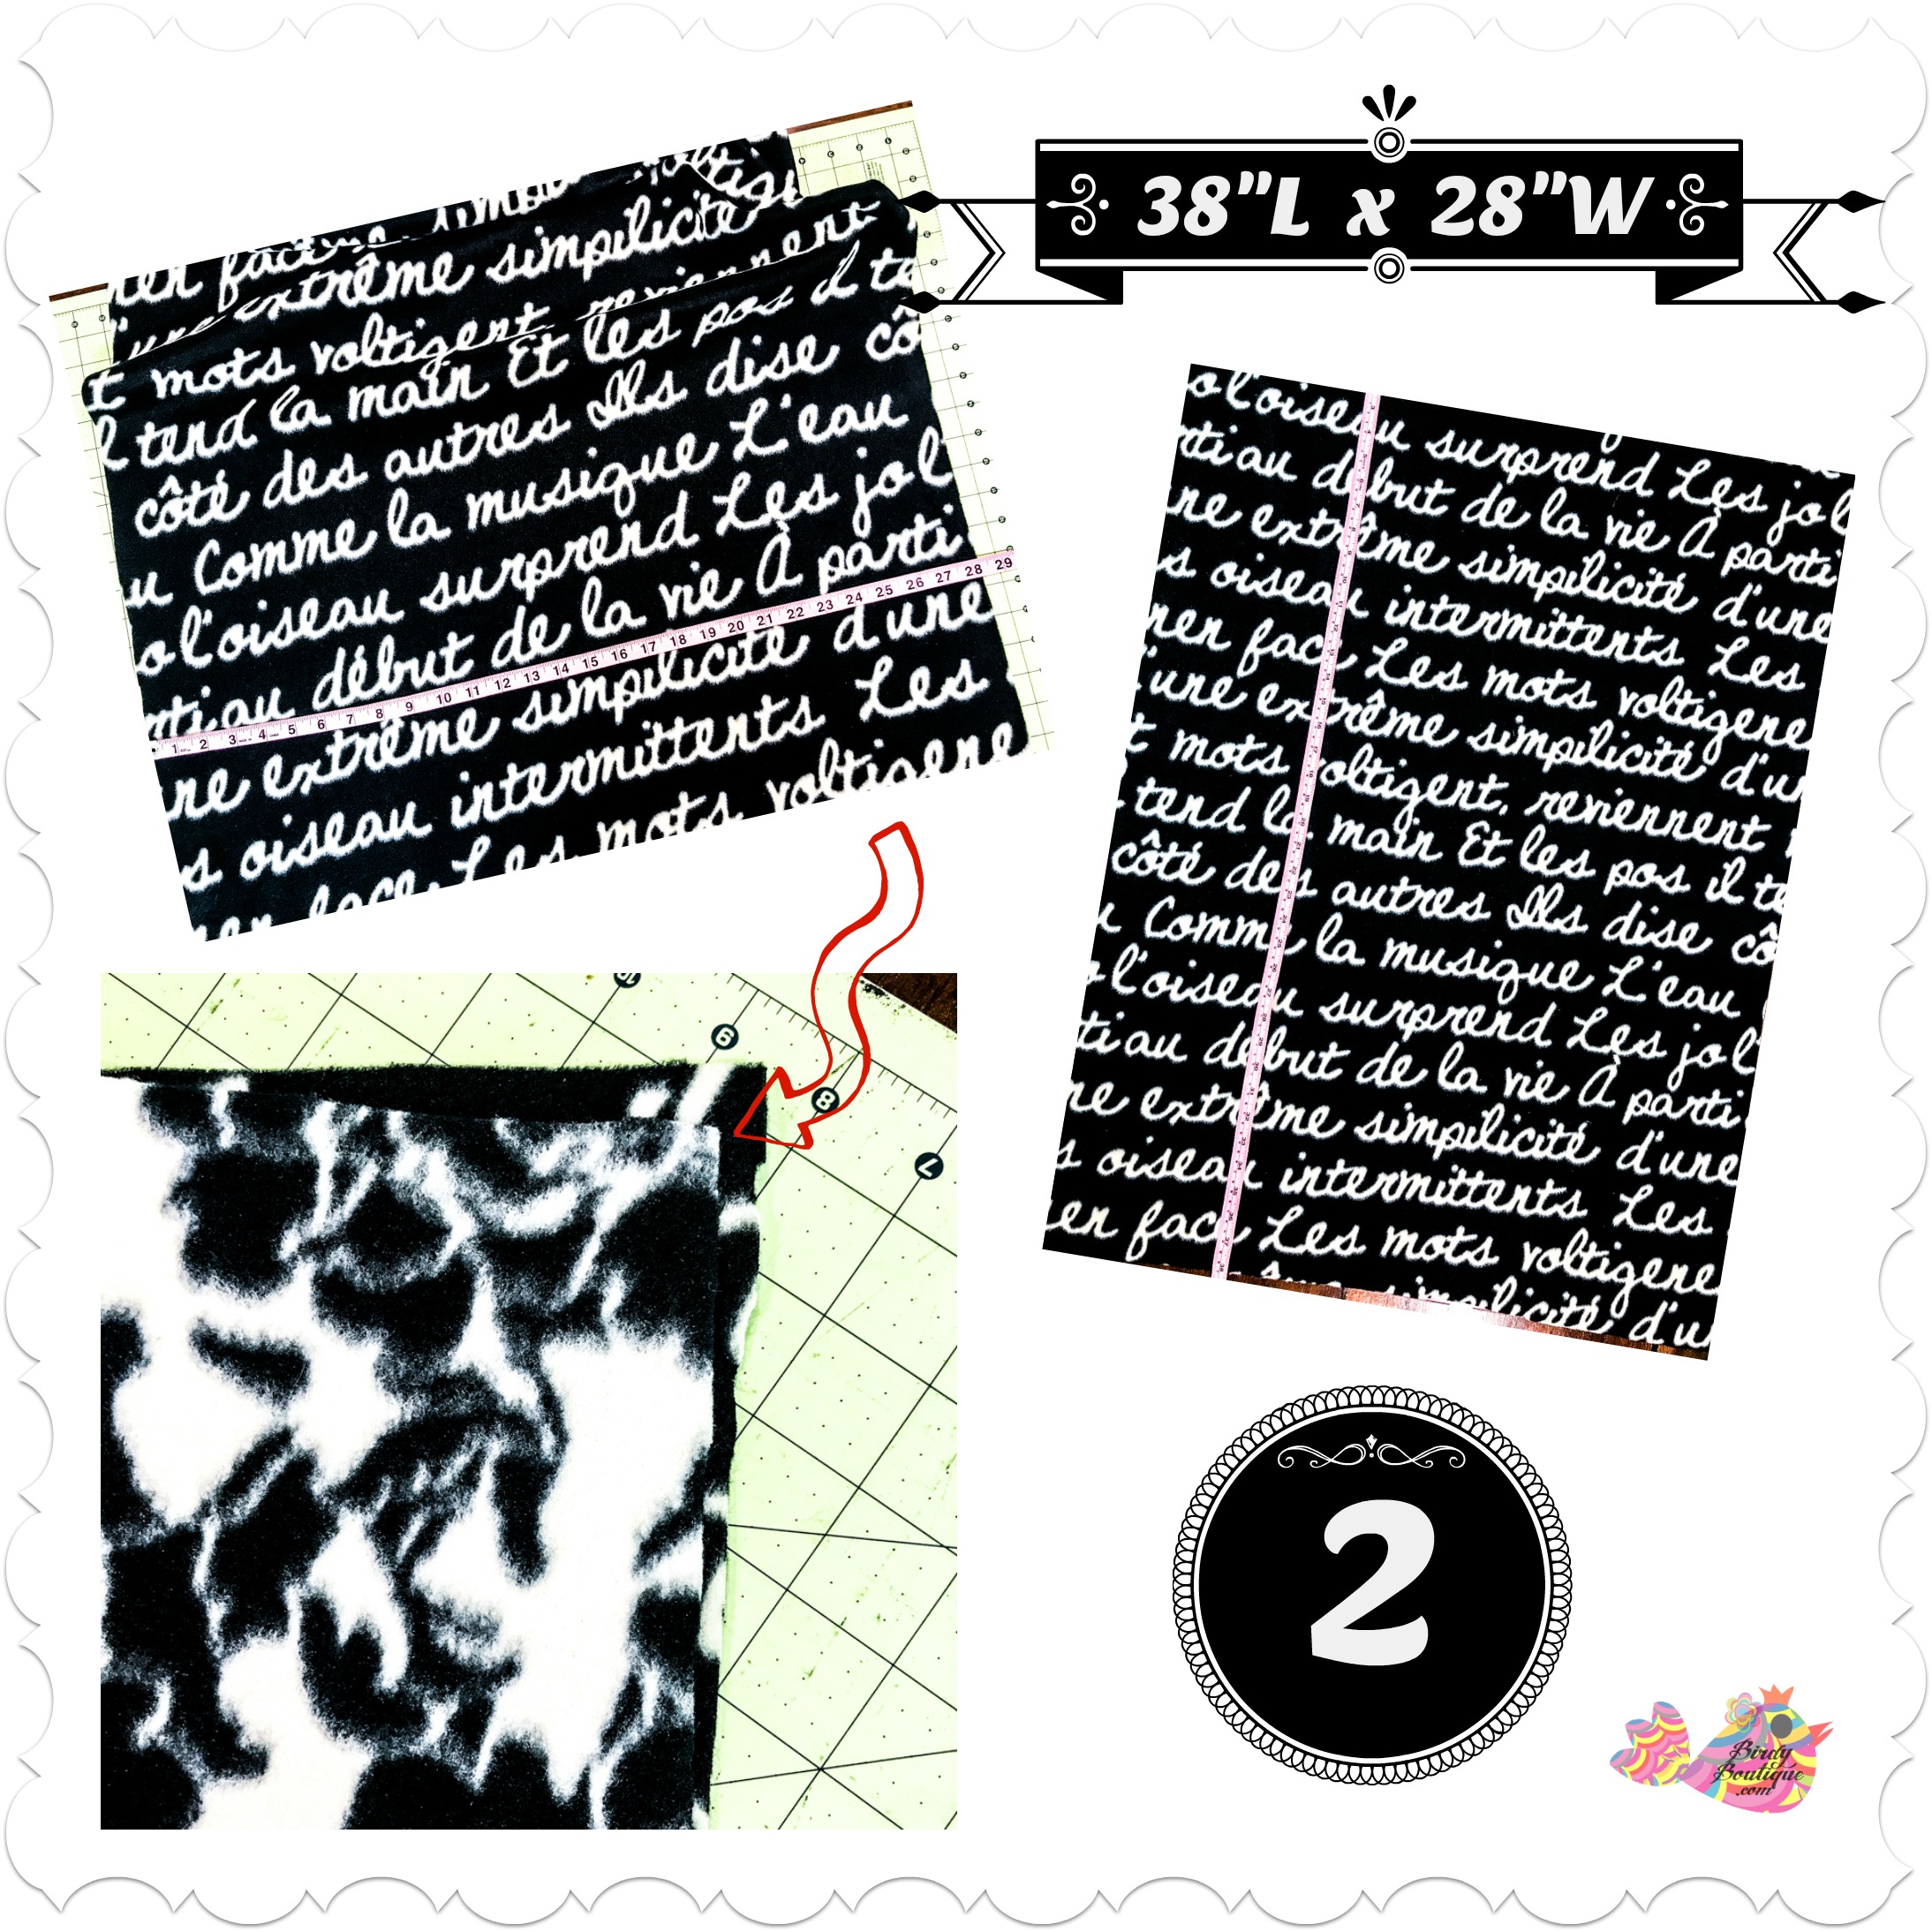
Lay out the fleece on a large surface, smooth it out, and measure (twice!). Mark the cut points with a removable ink pen or chalk and cut 2 rectangles, 38 in x 28 in each. The great thing about this poncho tutorial is that the pieces don’t have to be perfect, they don’t have to perfectly align and you won’t even see a difference.
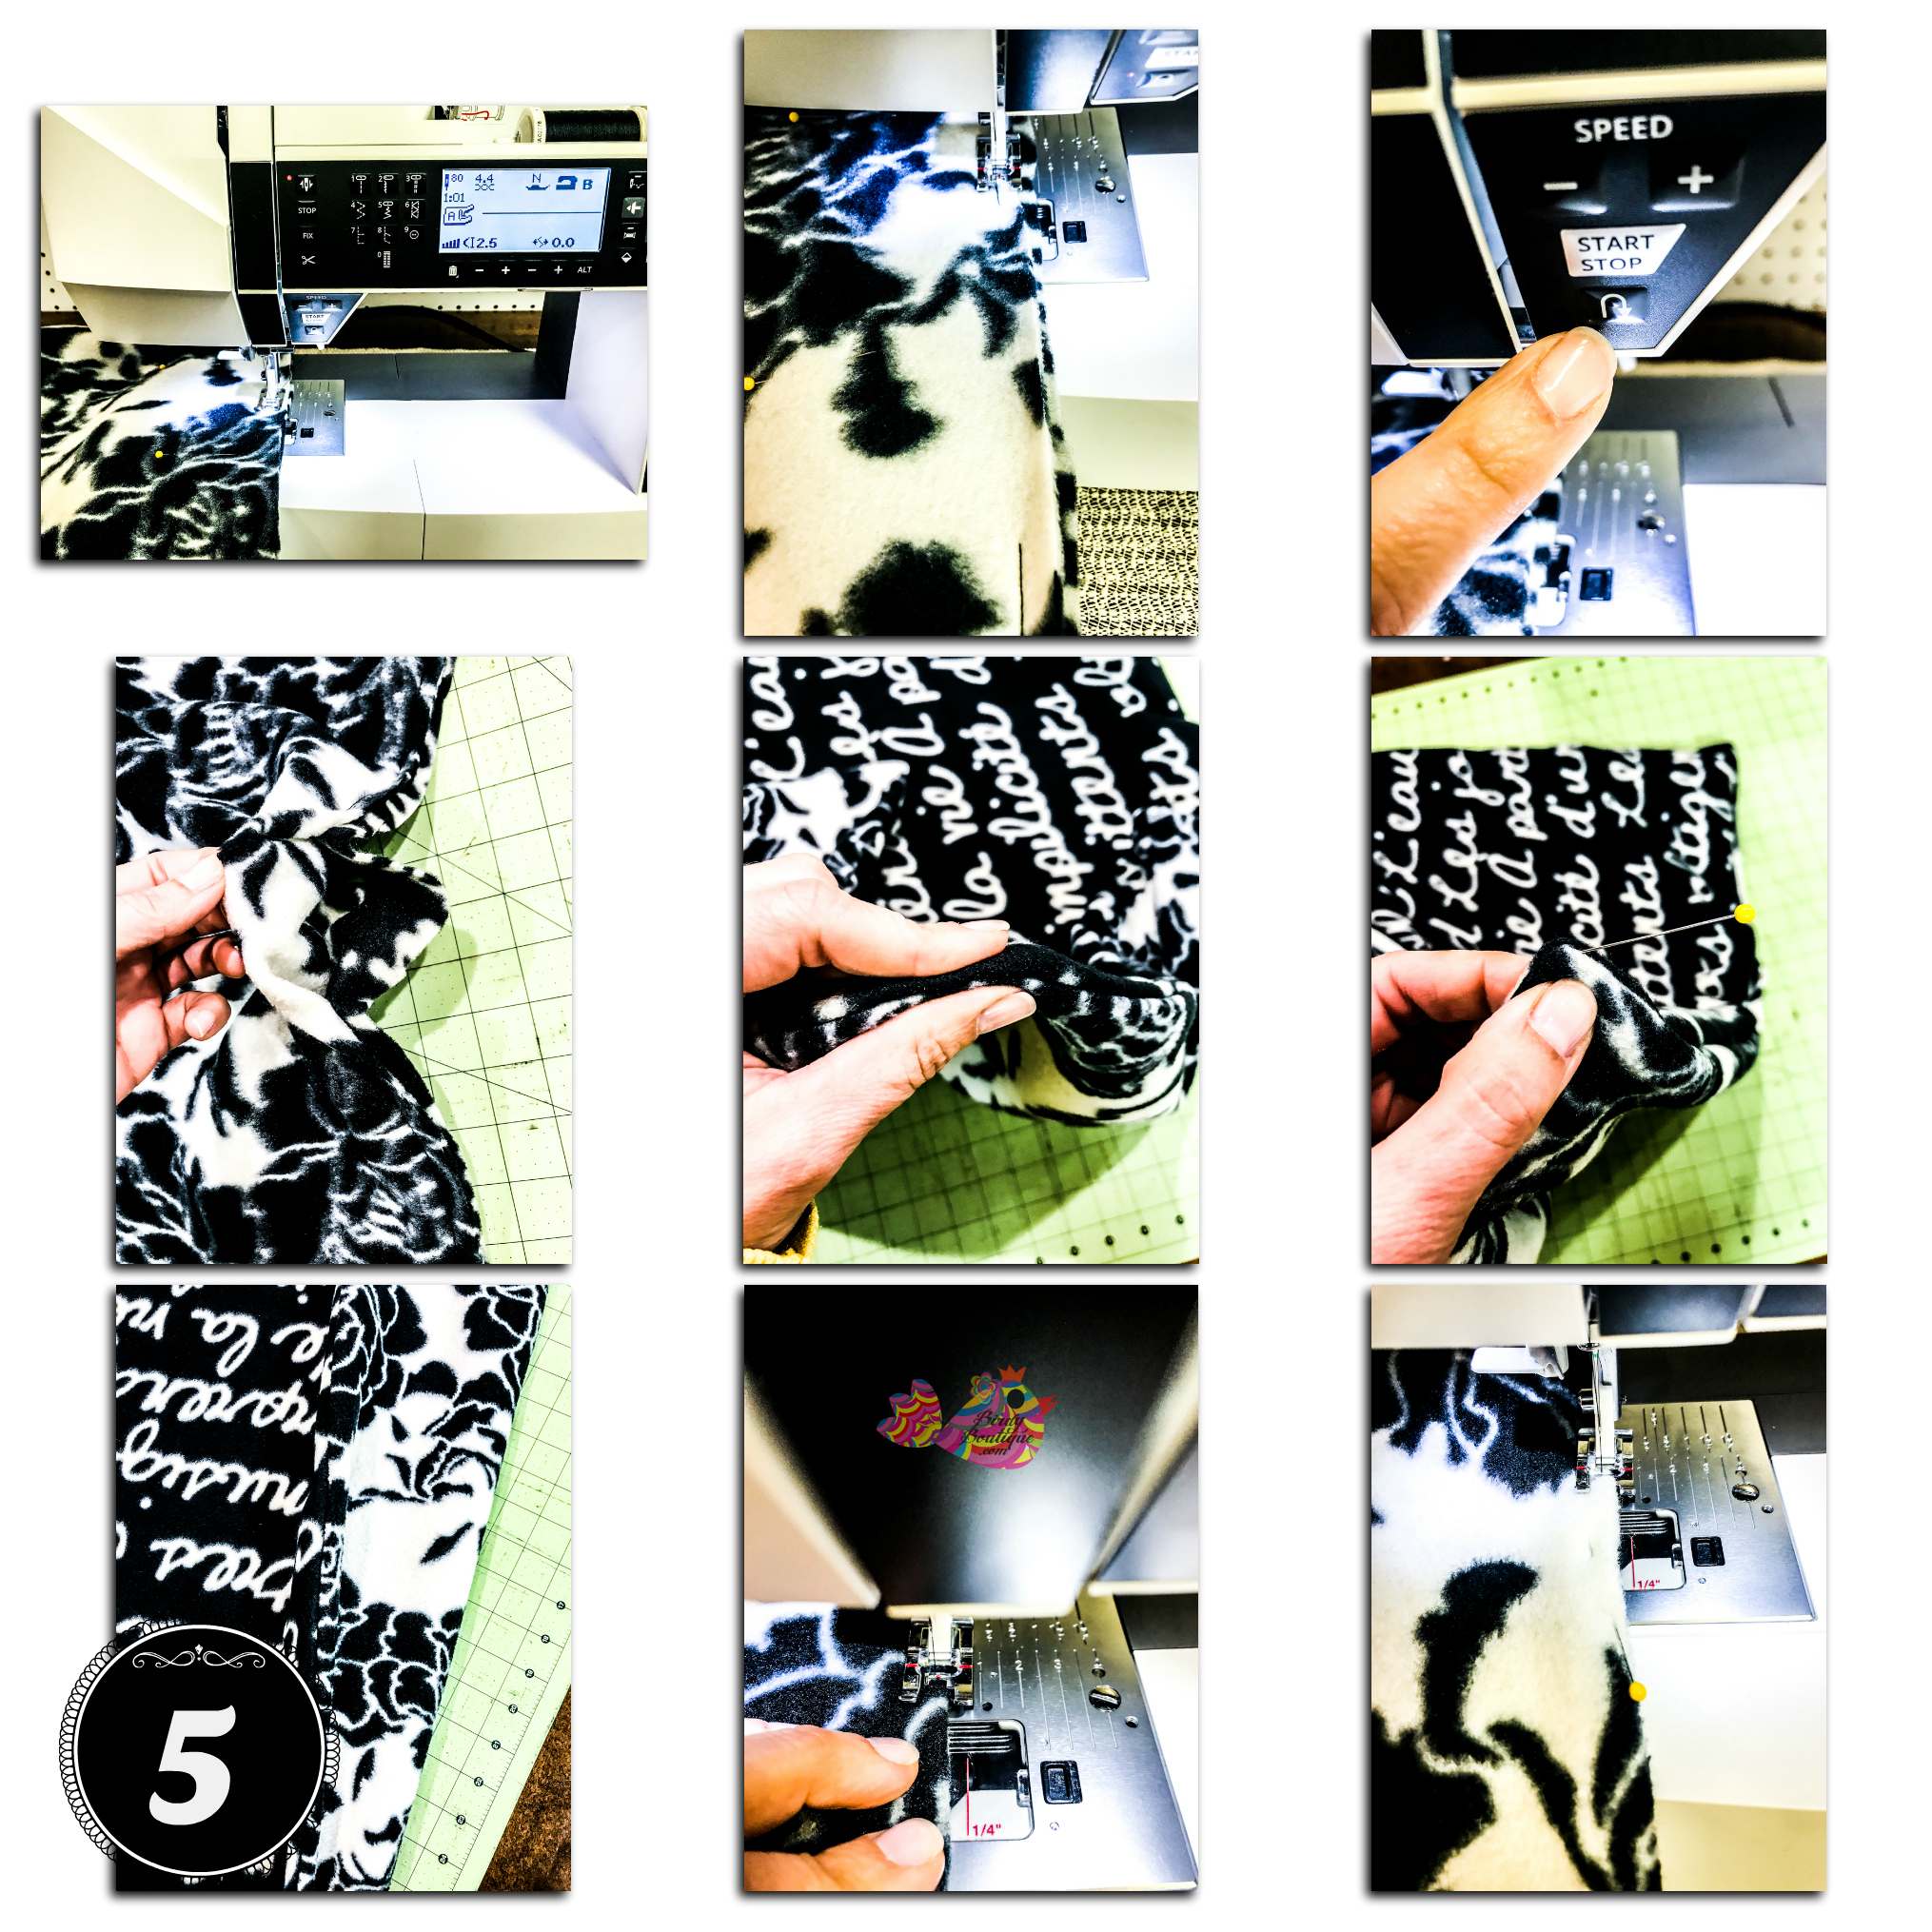
Step 3. Pin Body Pieces
Lay the two rectangular pieces on top of each other with right sides facing in. Smooth it out; fleece sticks to itself so I usually flip it over and smooth it on the other side as well. I do this until I get the sides generally even with each other. Now pin the fleece all the way around. Fleece has a lot of stretch to it so if you don’t pin well it will pucker and/or stretch. If you’re newer to sewing, pin a lot.
Step 4. Make A Hood Opening

Lay your pinned body pieces on a flat surface. Grab a measuring tape or ruler and something to mark with. The goal is to make a slit, the long way down the poncho, for the hood. See my picture. If you are using a directional patterned fleece, make sure it is oriented the right way up! Measure the midpoint of poncho from left to right; if you used my measurements this should be around 14 inches. Shift your measuring tape up or down until it is 7-8 inches from the top.
Mark this point. Then come down 11 inches, towards bottom of poncho, and mark this point. This will be the 11 inch slit that you will cut open for the hood. BEFORE you cut, measure again! And if you want, you can also check that the bottom point of your hood opening is centered as well. Now use either scissors or a rotary cutter to make the slit through both layers.
IF YOU WANT TO MAKE A DECORATIVE APPLIQUE, LIKE OUR BOW TIE, GO TO STEP 13 NOW
Step 5. Sew Body Pieces
STEP 5. Sew body pieces, flip, and top stitch. Sew the body pieces together and take your time; I use the edge of my sewing foot to guide the seam allowance. Fleece tends to stretch and then pucker. If you notice a little bunching, just lift the foot up to ease the tension on the fabrics, put it back down, and continue to sew. Make sure to leave a 3-4 inch opening along one of the sides so that you can flip the poncho out.
I prefer to do this on one of the sides rather than a corner; it is much easier to close up later. Once finished, flip the poncho right side out. Use your fingers to get the corners and sides pressed out as much as possible; I press the sides along the seams with my fingers, and use a pin to pull out the corners. Now it’s time to top stitch. Use a bit longer of a stitch for this; I increase mine from 2.5 to 3. It looks better and won’t pucker.
Sew slowly about 1/8 inch from the edge, or whatever makes you comfortable, and use your finger to guide the fabric. I usually have to pinch the edge and guide it in to make sure that the seam is out as much as possible. See step 5 photo. You can pin the opening and slow down when you get to it as it may take extra finagling to line up the edges; or you can just eye it and go for it.
Step 6. Sew Around Hood Opening
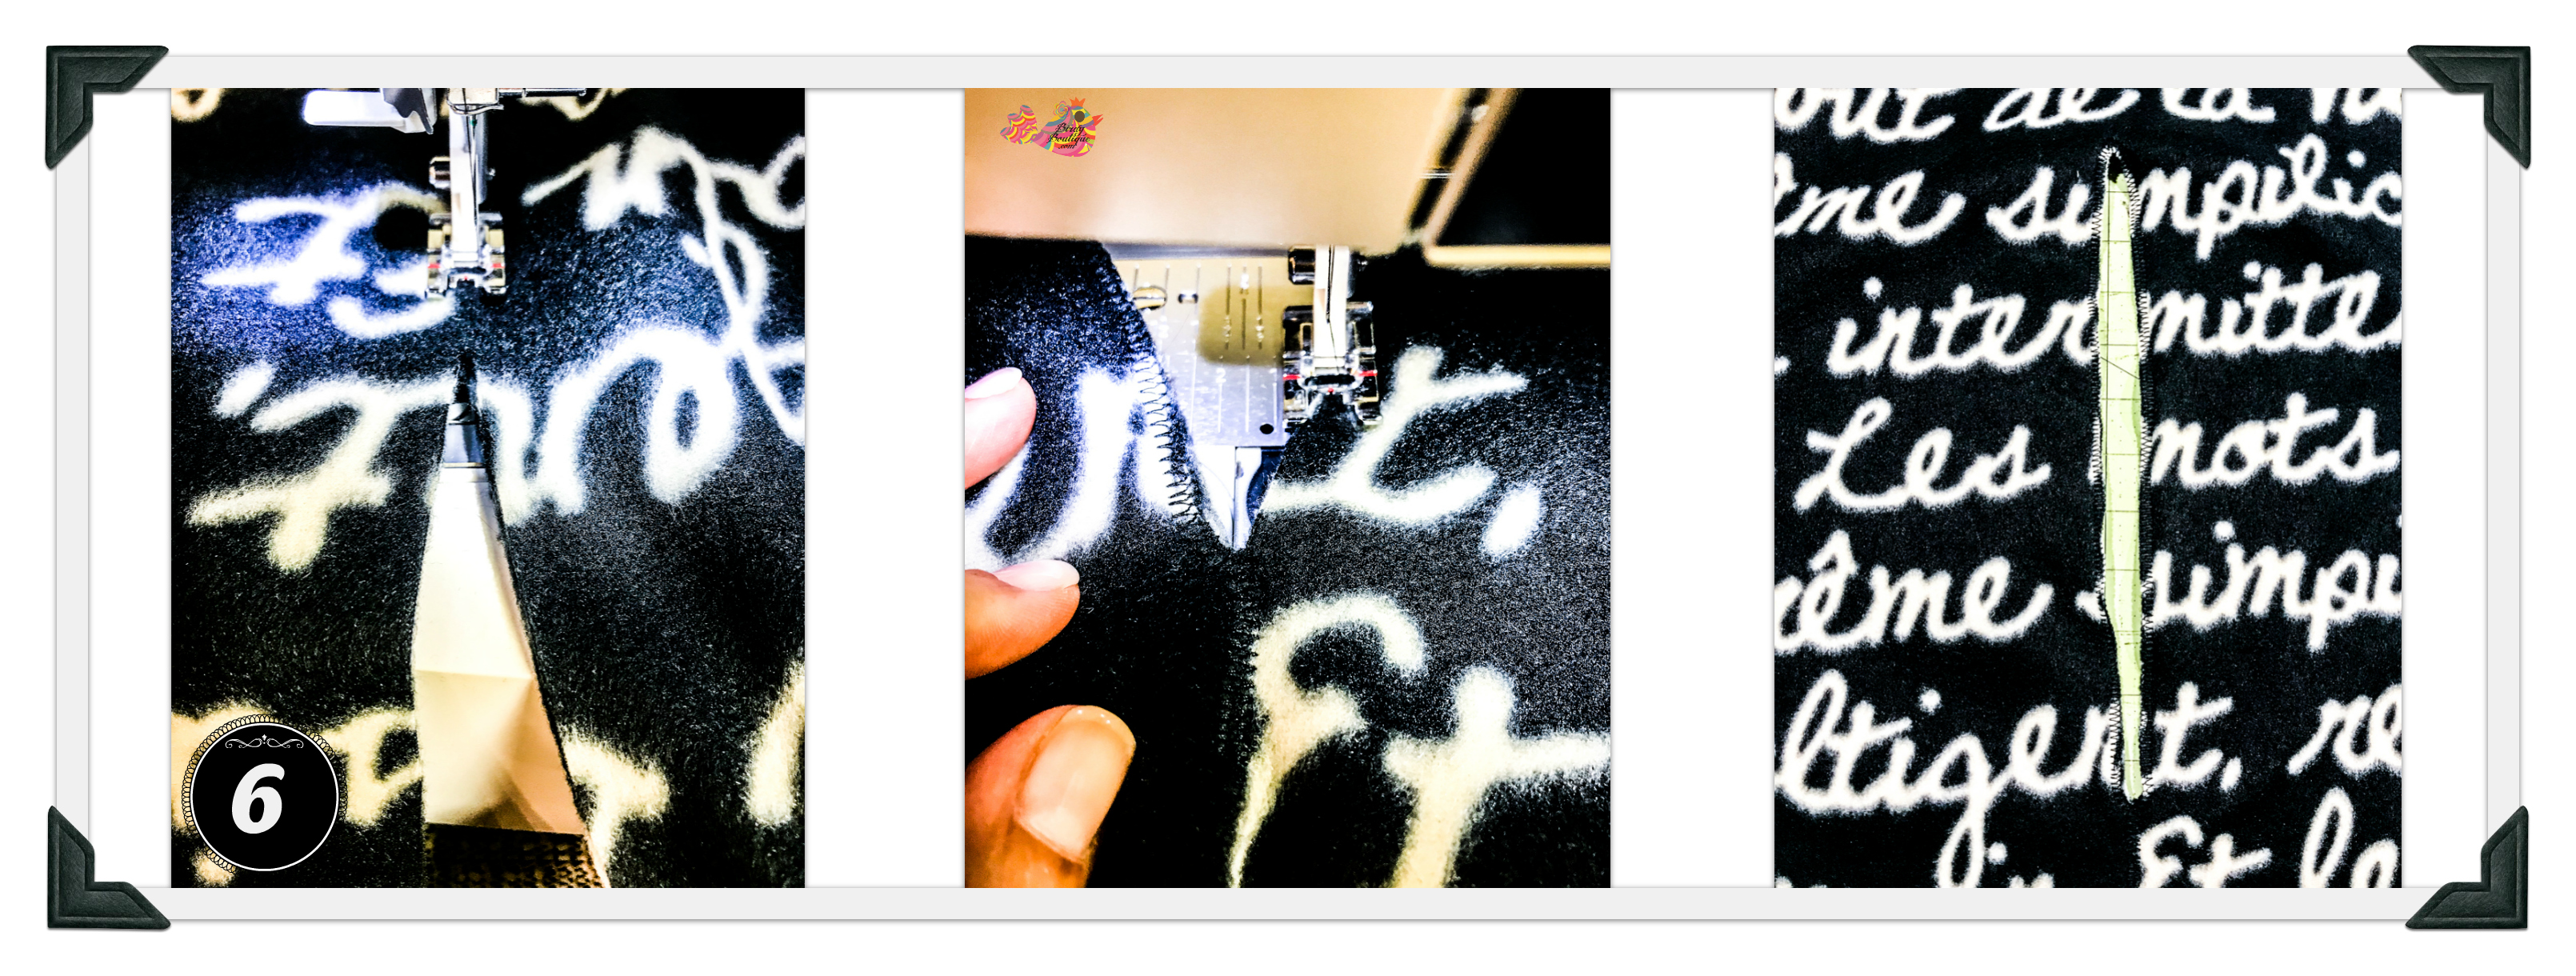
STEP 6. Sew around the hood opening. Choose a loose zig zag stitch for this part. All you are doing is closing up the two layers so that it is easier to sew the hood on. You will have to do a lot of shifting of the fleece to ensure that the layers stay even. If it’s easier, go ahead and pin to keep the layers in place. I usually start this about an inch down from the bottom of the opening and go up and around. I sew right over that same inch on the bottom to make sure there is no unraveling.
Step 7. Cut Out Hood Pieces
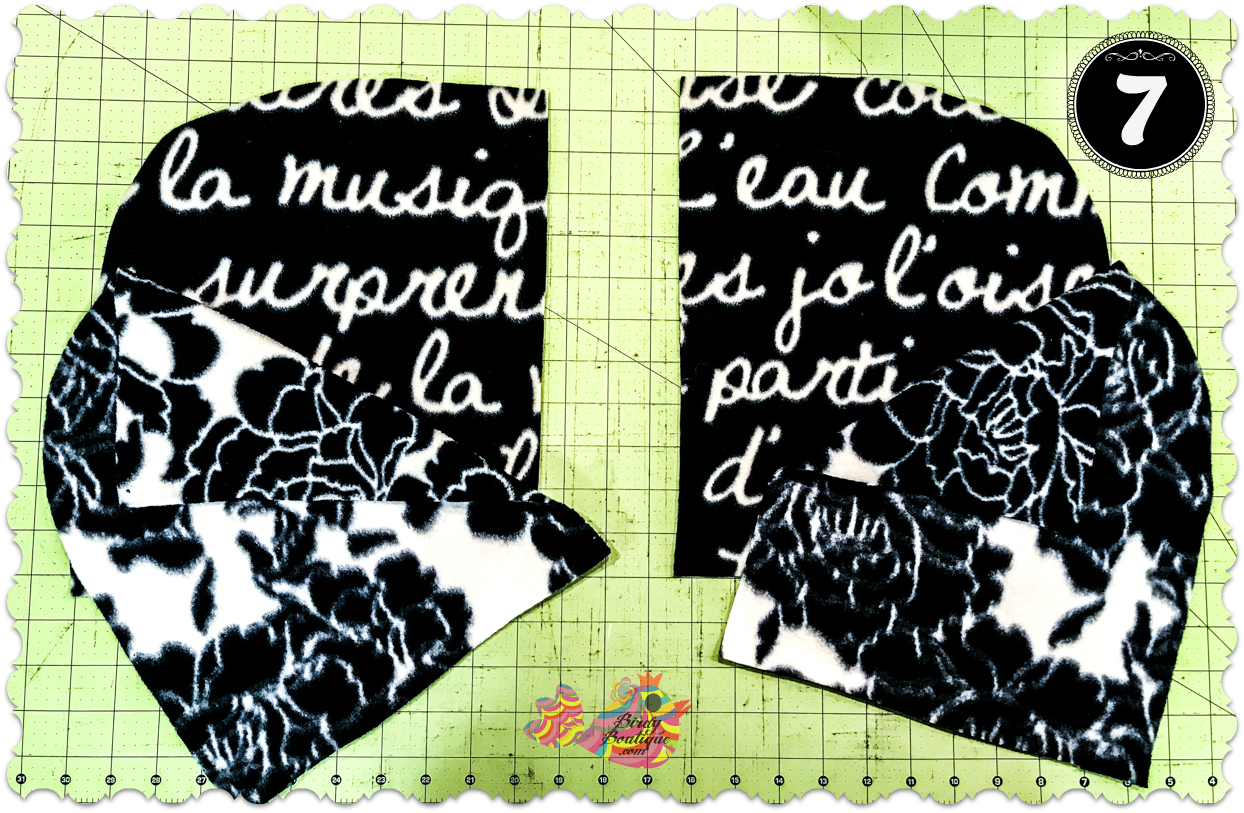
STEP 7. Cut out hood pieces. Fold the fleece in half, right sides together, so you have two layers.
Note: MAKE SURE THAT THE RIGHT SIDES ARE TOGETHER AND IF YOU HAVE DIRECTIONAL PATTERNS MAKE SURE THEY ARE FACING THE RIGHT WAY UP WHEN YOU CUT. IF YOU DON’T DO THIS YOUR HOOD WILL NOT GO TOGETHER CORRECTLY.
Place the pattern on fleece and pin if you would like. I use a rotary cutter but you can also use scissors to cut out the shape. And cut! If you are using two different patterns of fleece, cut out 1 (double) pattern of each design.
Step 8. Pin Hood Pieces
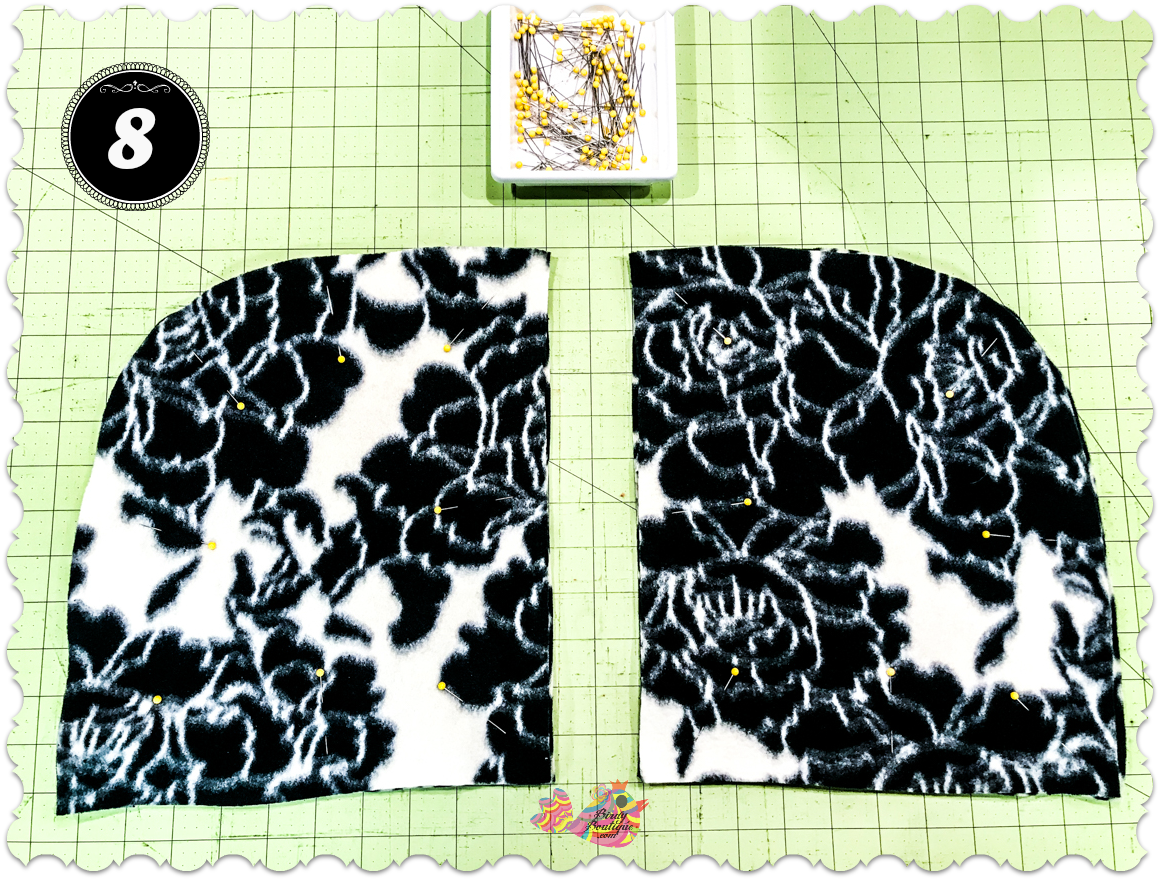
STEP 8. Pin hood pieces/halves. Lay out the hood pieces with right sides facing each other, match up the ends as best as possible, and pin them together. IF YOU ARE USING TWO DIFFERENT DESIGNS, LAY ONE DESIGN ON BOTTOM AND ONE DESIGN ON TOP (take a quick look at the picture) and repeat the same with the other two pieces. You will be sewing two different designs together.
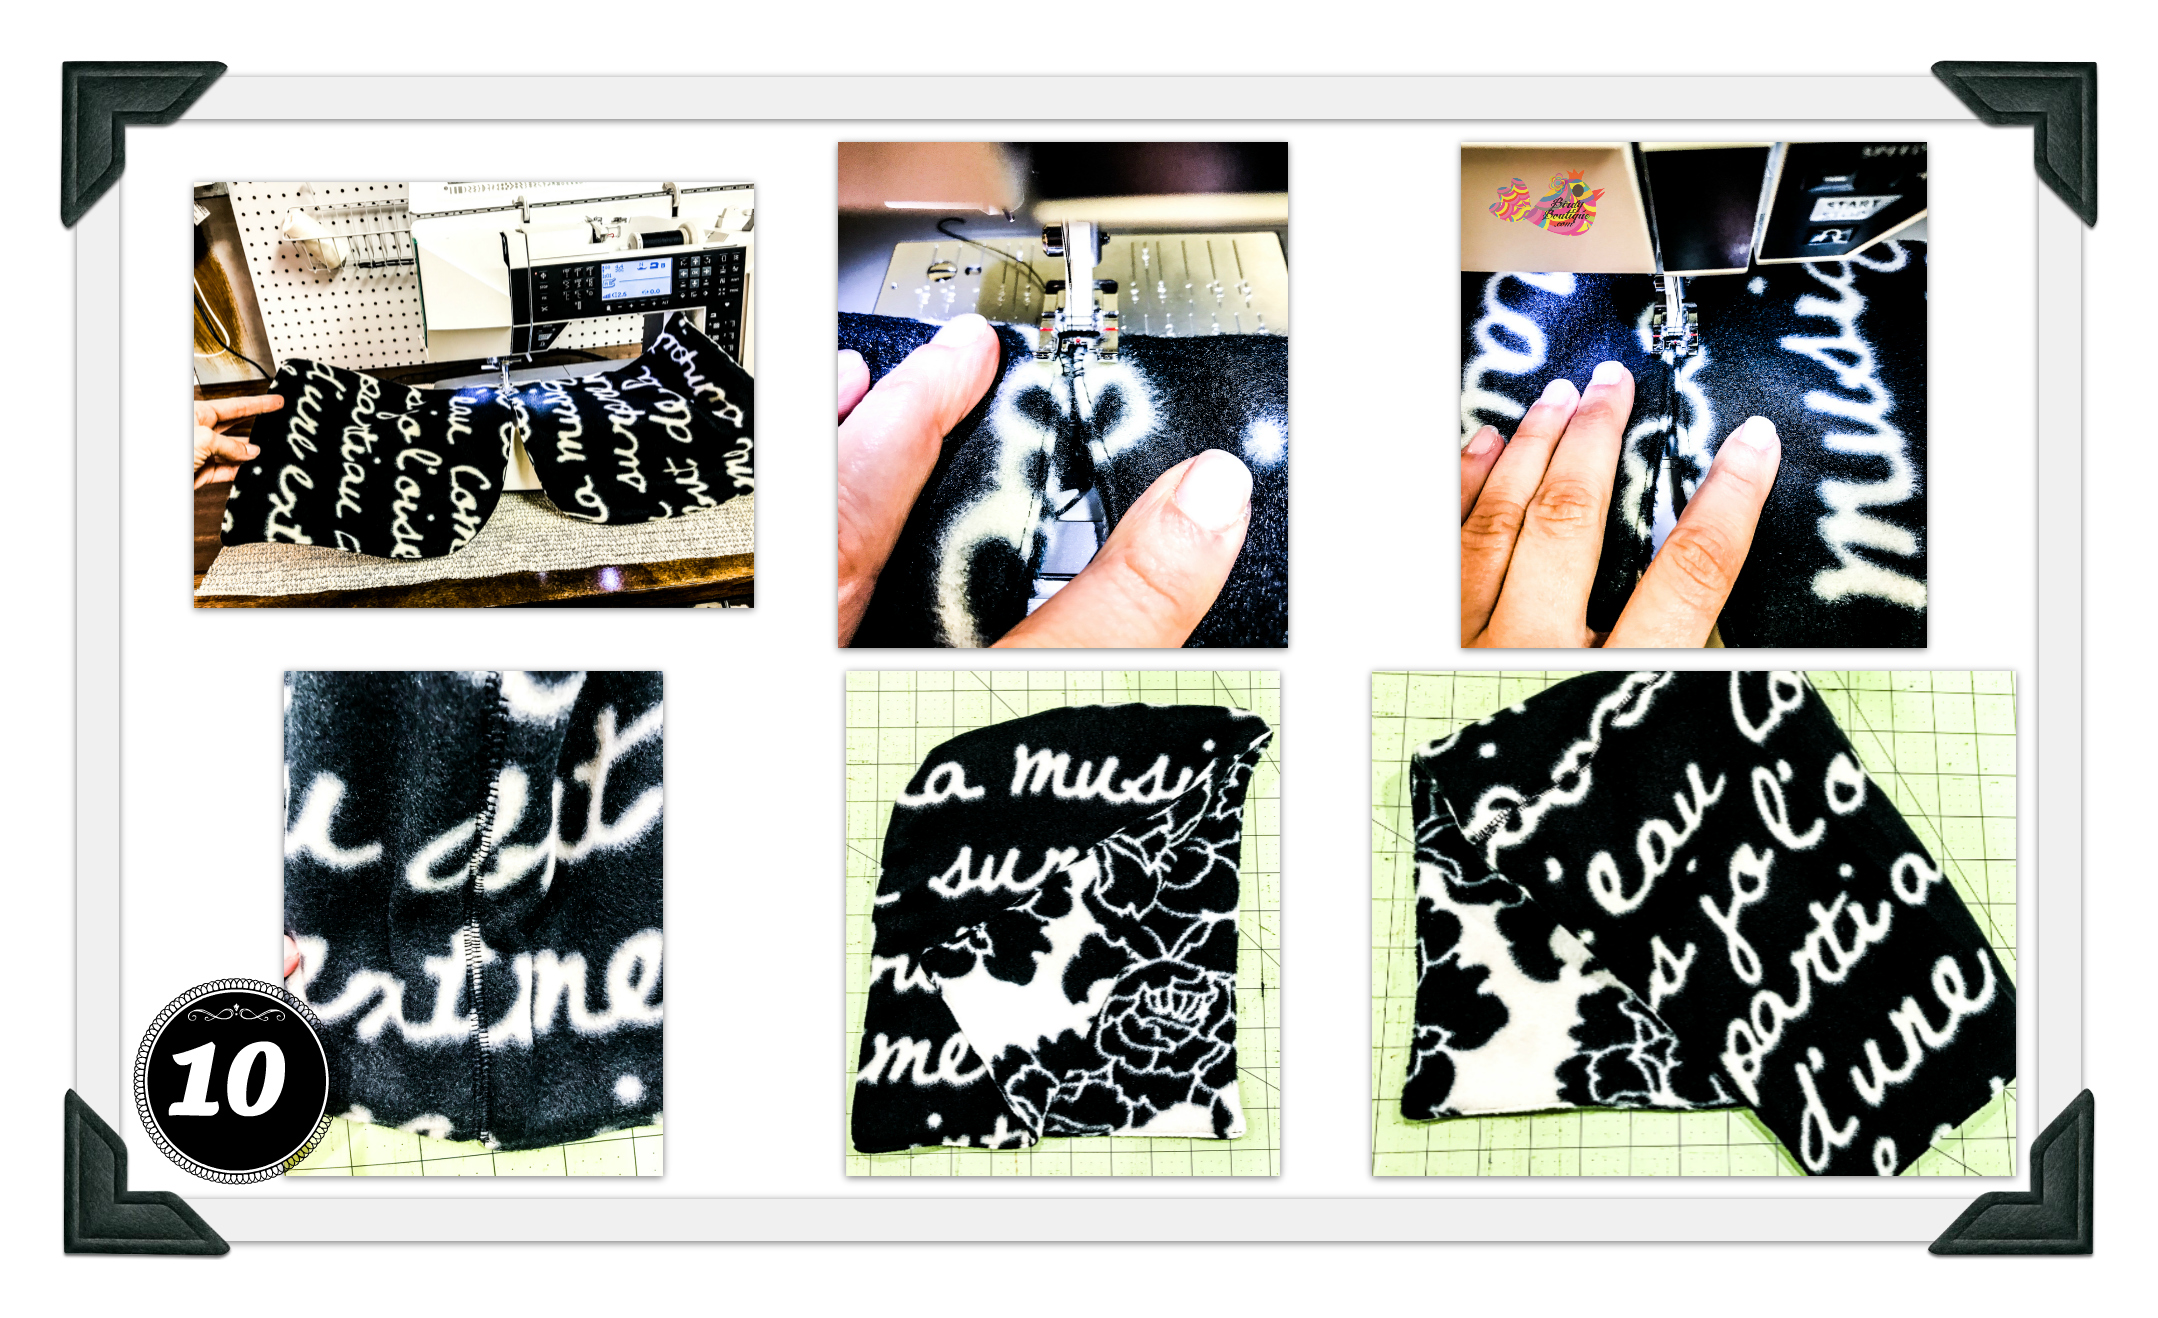
Step 9. Sew Hood Halves

STEP 9. Sew hood halves, flip, and top stitch. Sew hood halves together leaving a 2-3 inch opening along the bottom (base) of the hood. Flip the hood halves out and pull the edges and corners out with your fingers and/or pins. Top stitch the hood halves just like you did the body of the poncho. Slow down when you get to the opening and use your fingers to match up the edges. Do this for the other half as well.
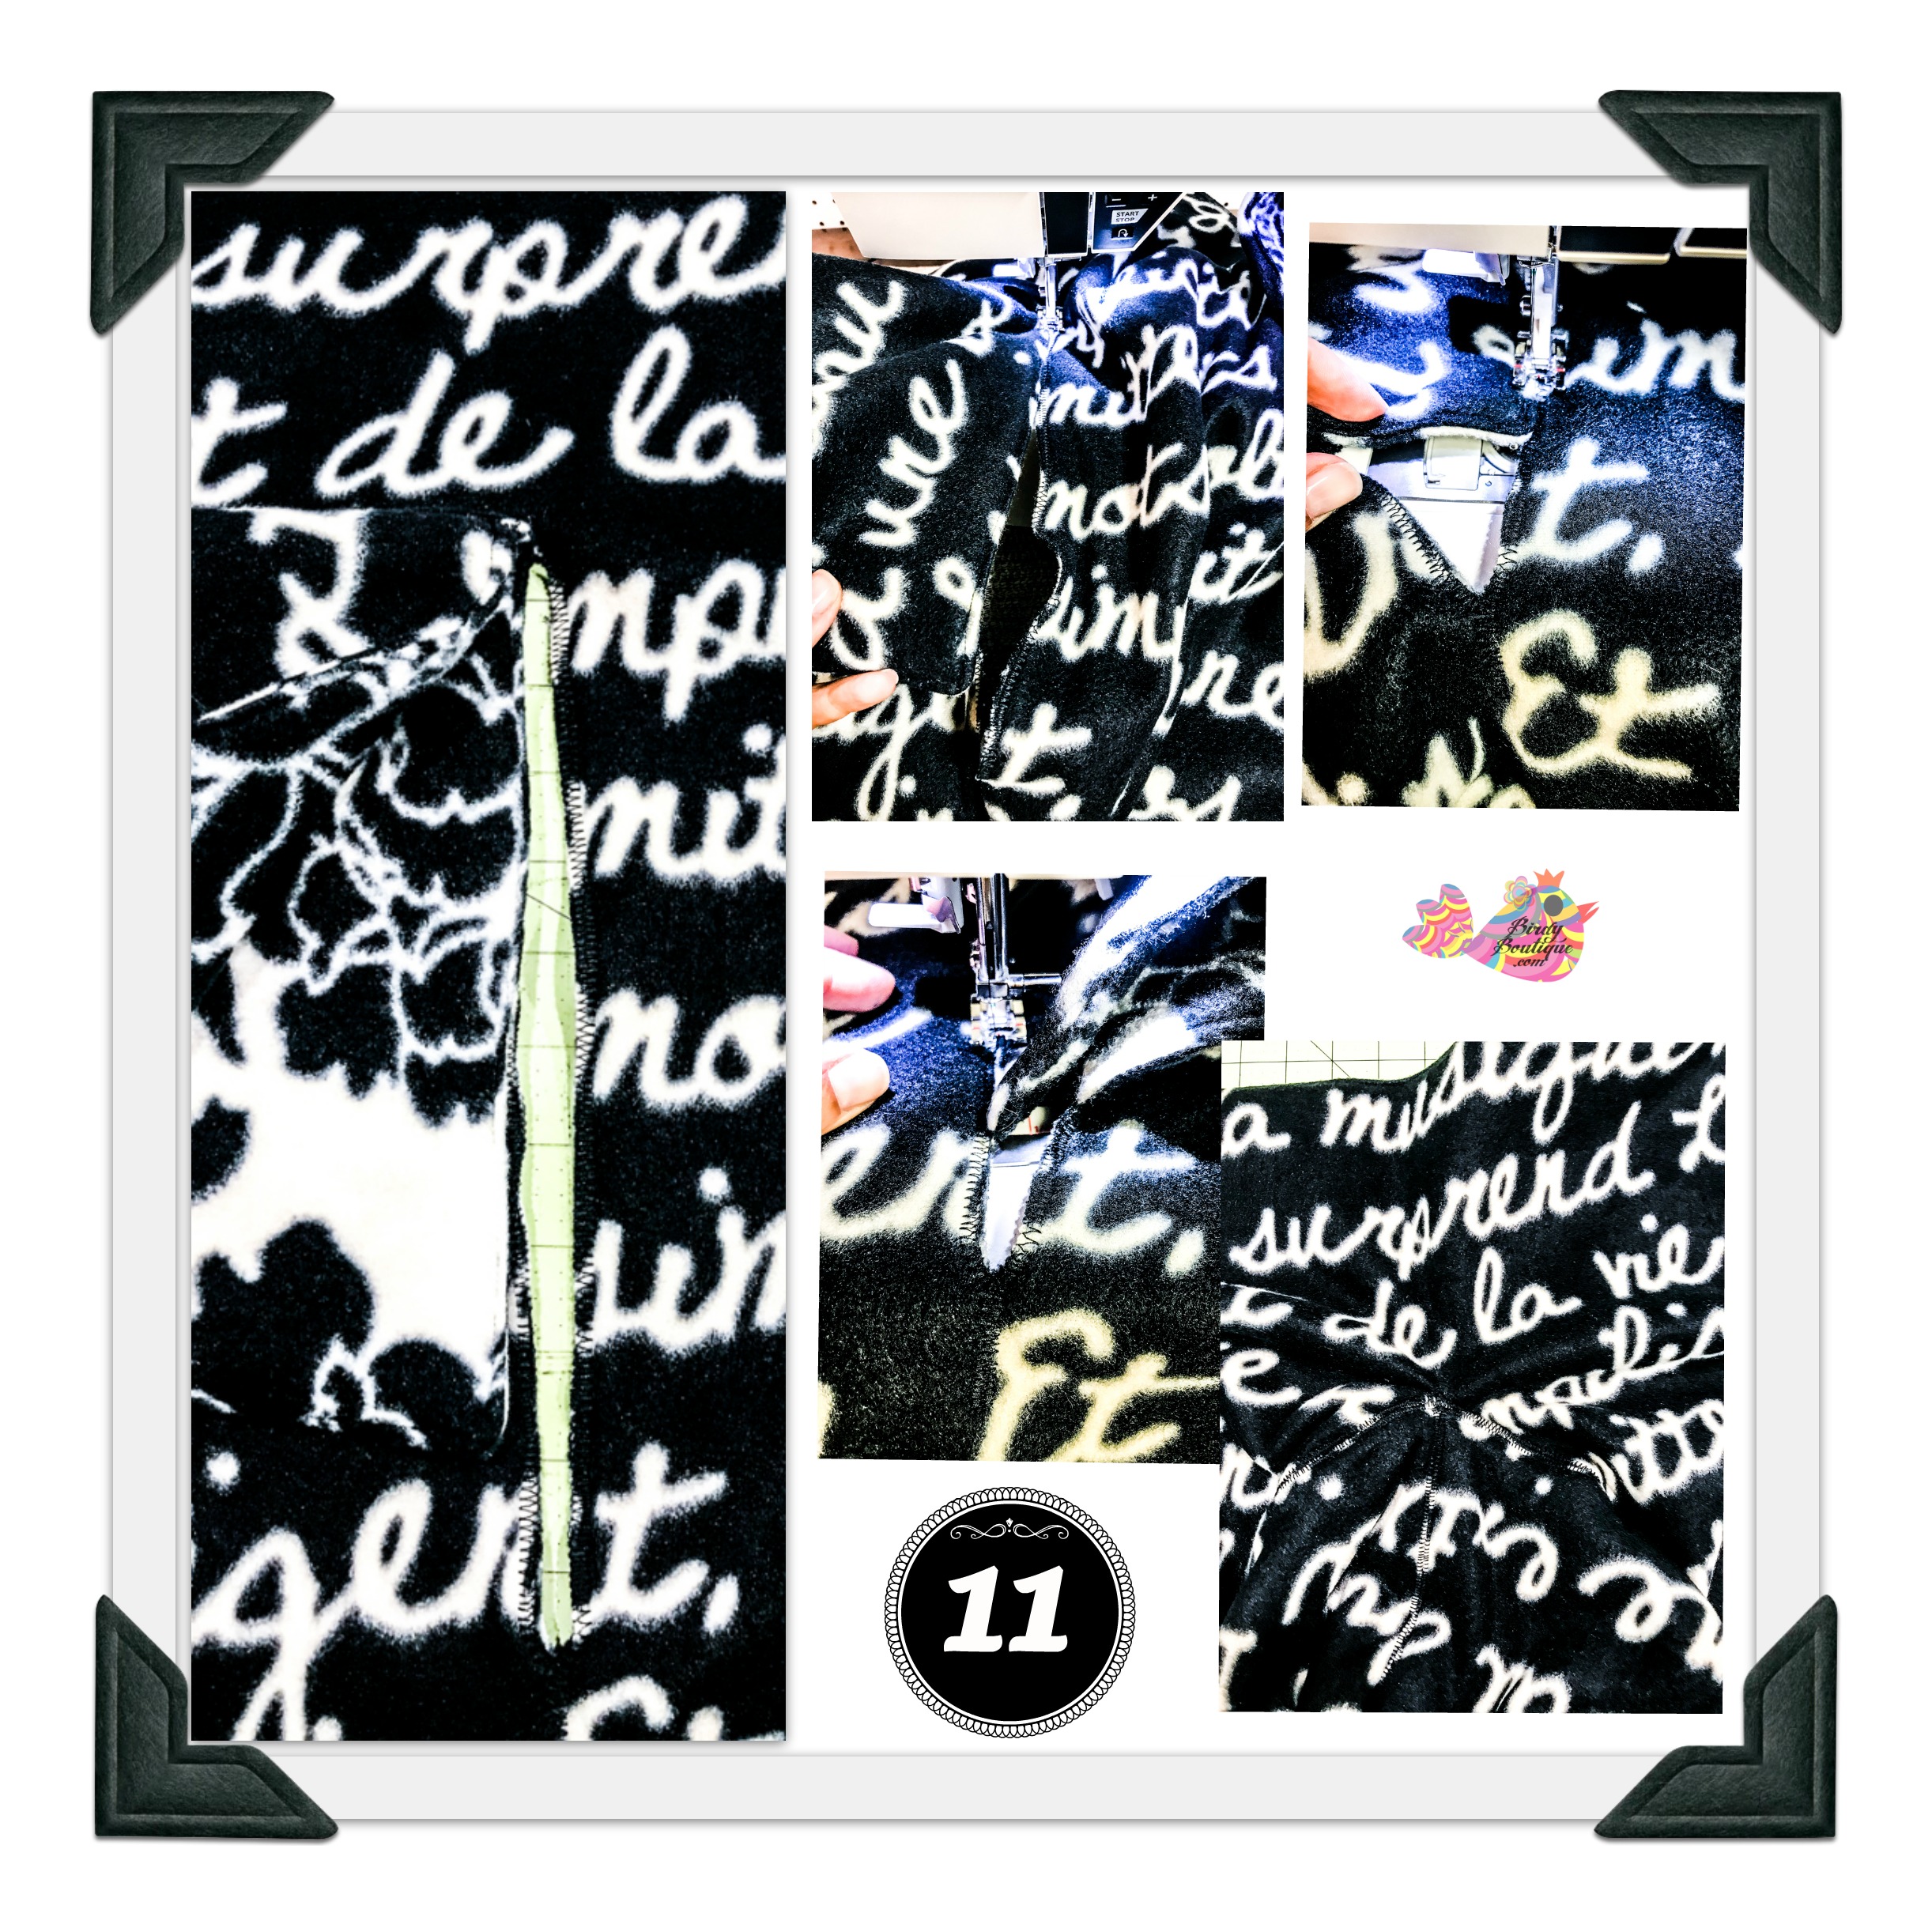
Step 10. Sew Hood Pieces Together
STEP 10. Sew hood pieces together. Use a long dense zig zag stitch. Practice on a scrap of fabric to make sure it is not too short to hold the halves together. Start at the top of the hood about an inch in. Sew backwards, toward the top of the hood, and reverse and come forward sewing together the entirety of the hood. At the end reverse again and sew for about an inch.
Step 11. Sew Hood to Body
STEP 11. Sew hood to body. Match the back corner of the hood to the top corner of the opening. Use the same zig zag stitch as in STEP 8. Sew down each side making sure that you reverse back an inch or so at each front side of hood. Also, make sure that you sew back and forth over the back corner (at top of hood opening) to reinforce the seam. That’s it, you are done with your cozy warm hooded blanket! Great work!
Extras & Optional Steps
Step 12. Sew on Decorative Trim
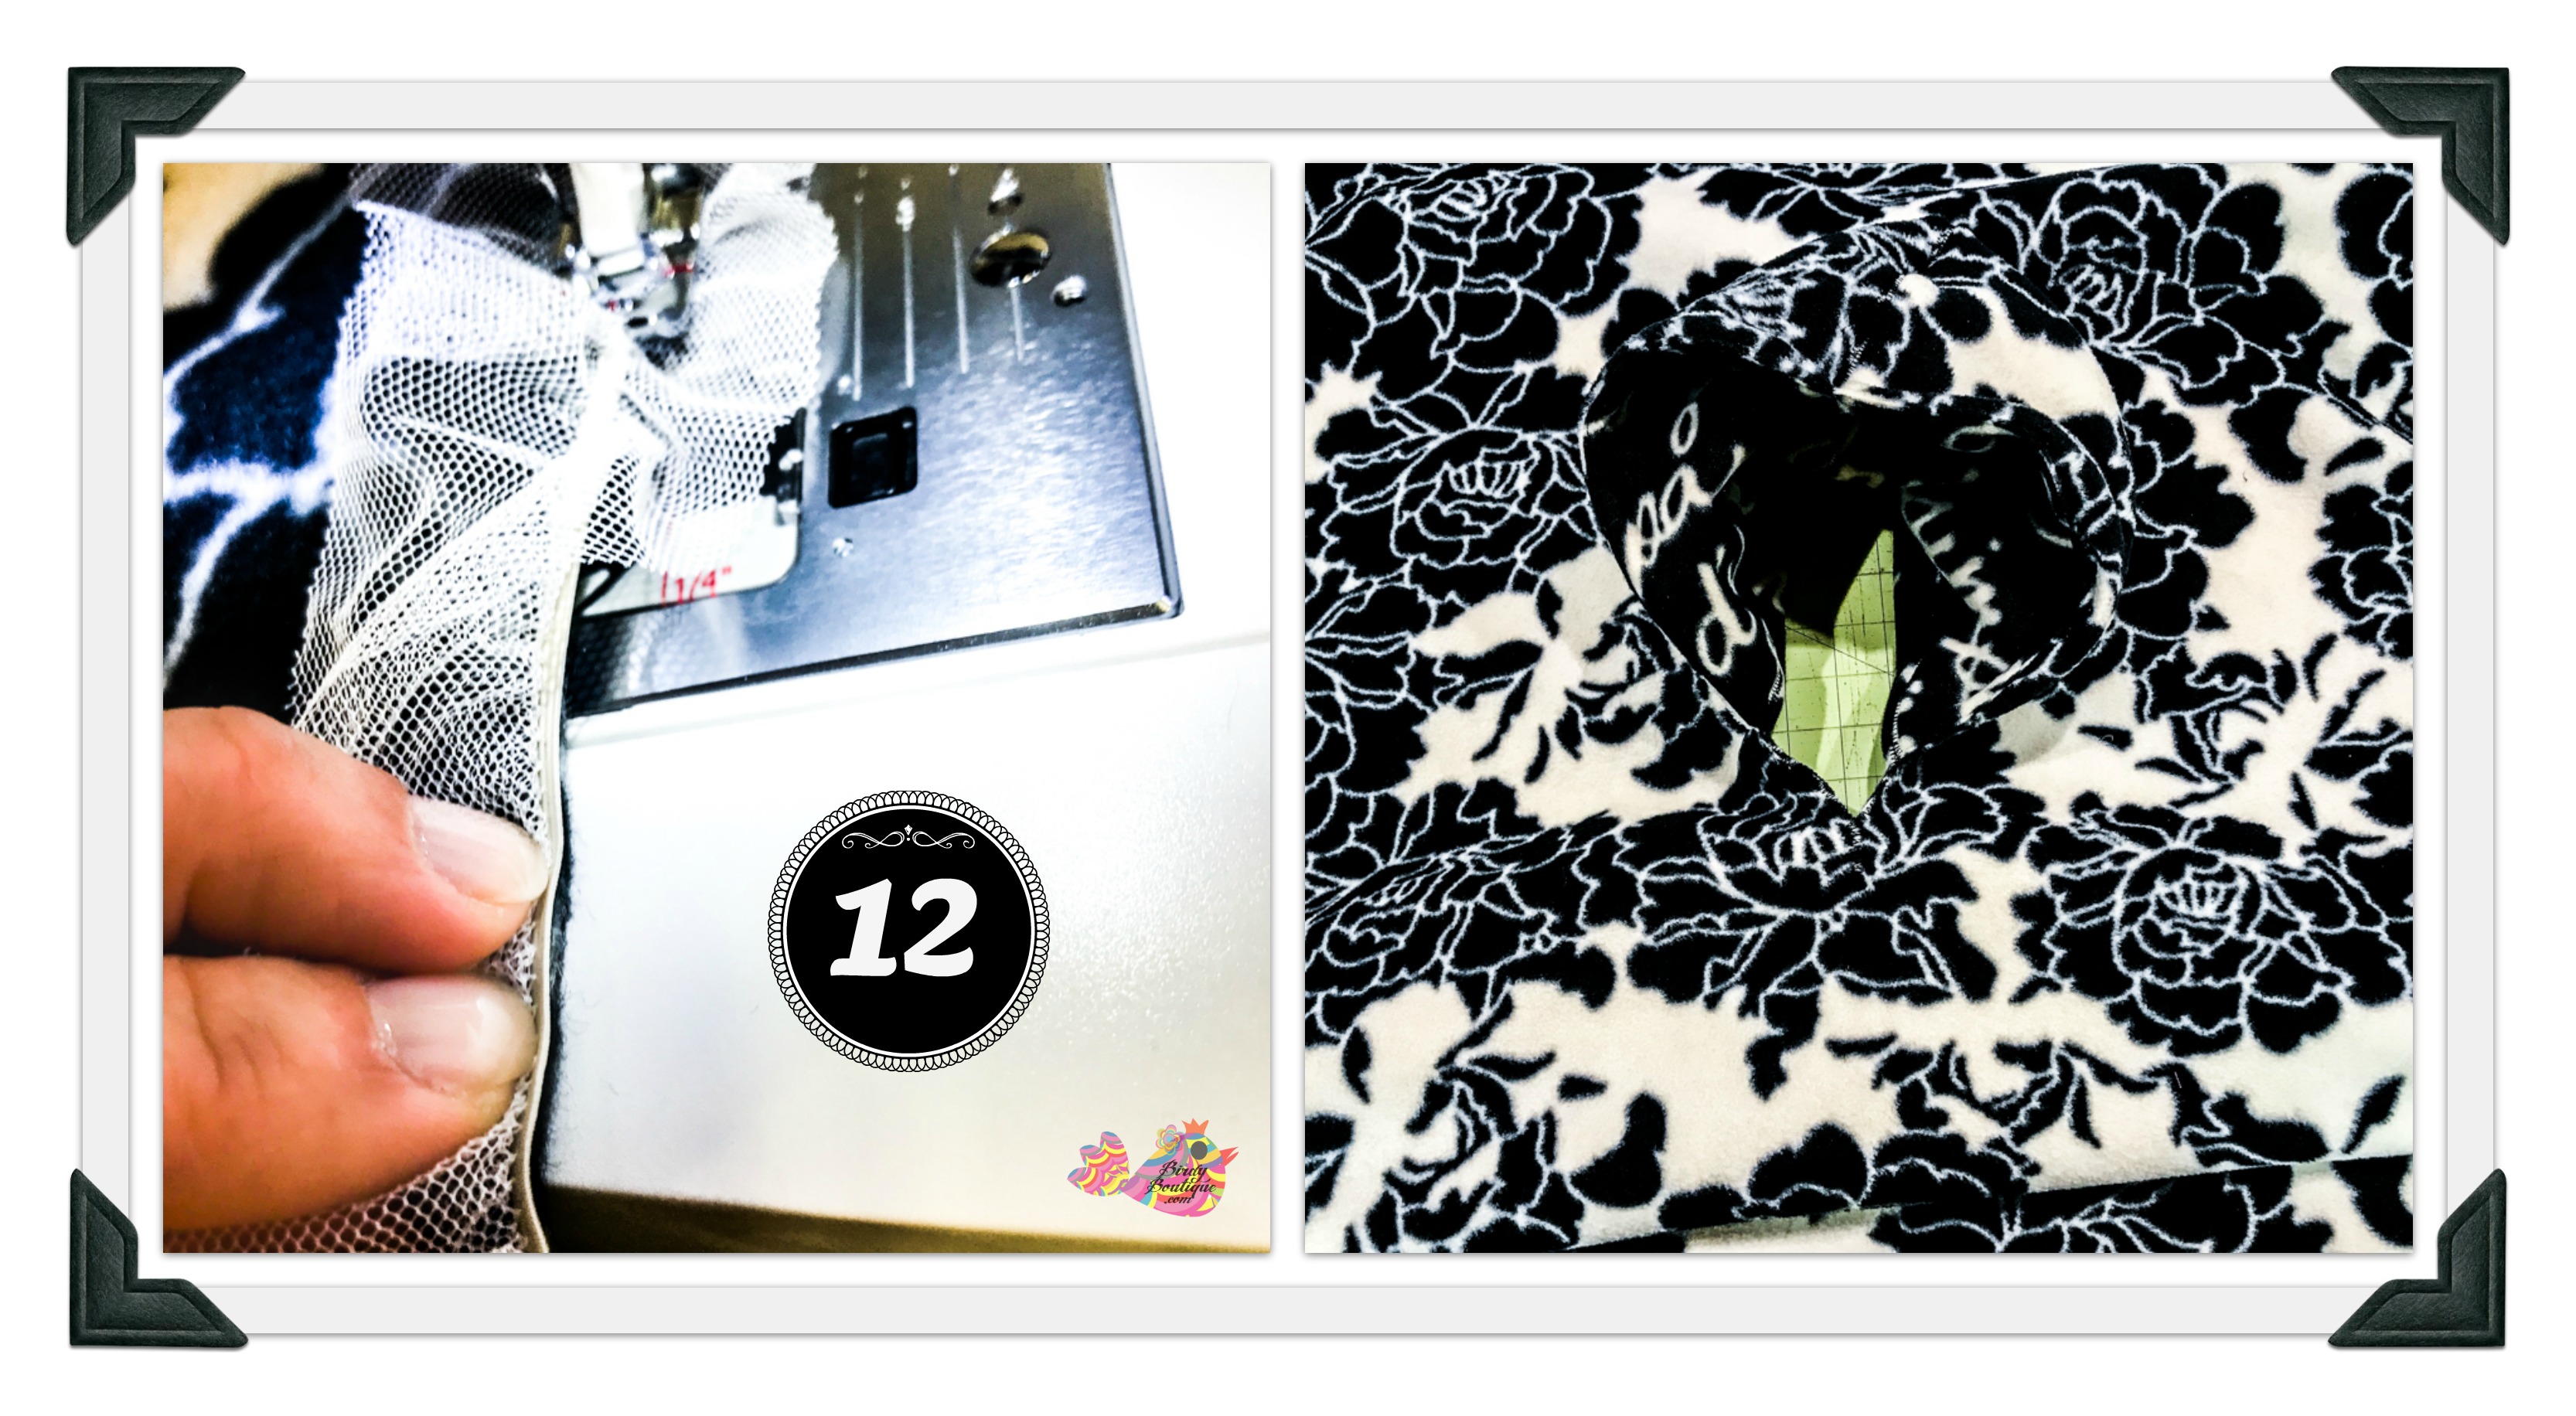
STEP 12. Sew on decorative trim. Line up the trim on the top stitch on edge of poncho body. Slowly sew down the middle of the trim onto the top stitch on poncho by using your fingers to feed it through evenly. This will take time and if it makes it easier for you, pin first. Continue all the way around and overlap by ¼ inch or so when the ends of trim meet to prevent a gap. Follow instructions.
Step 13. Decorative Applique
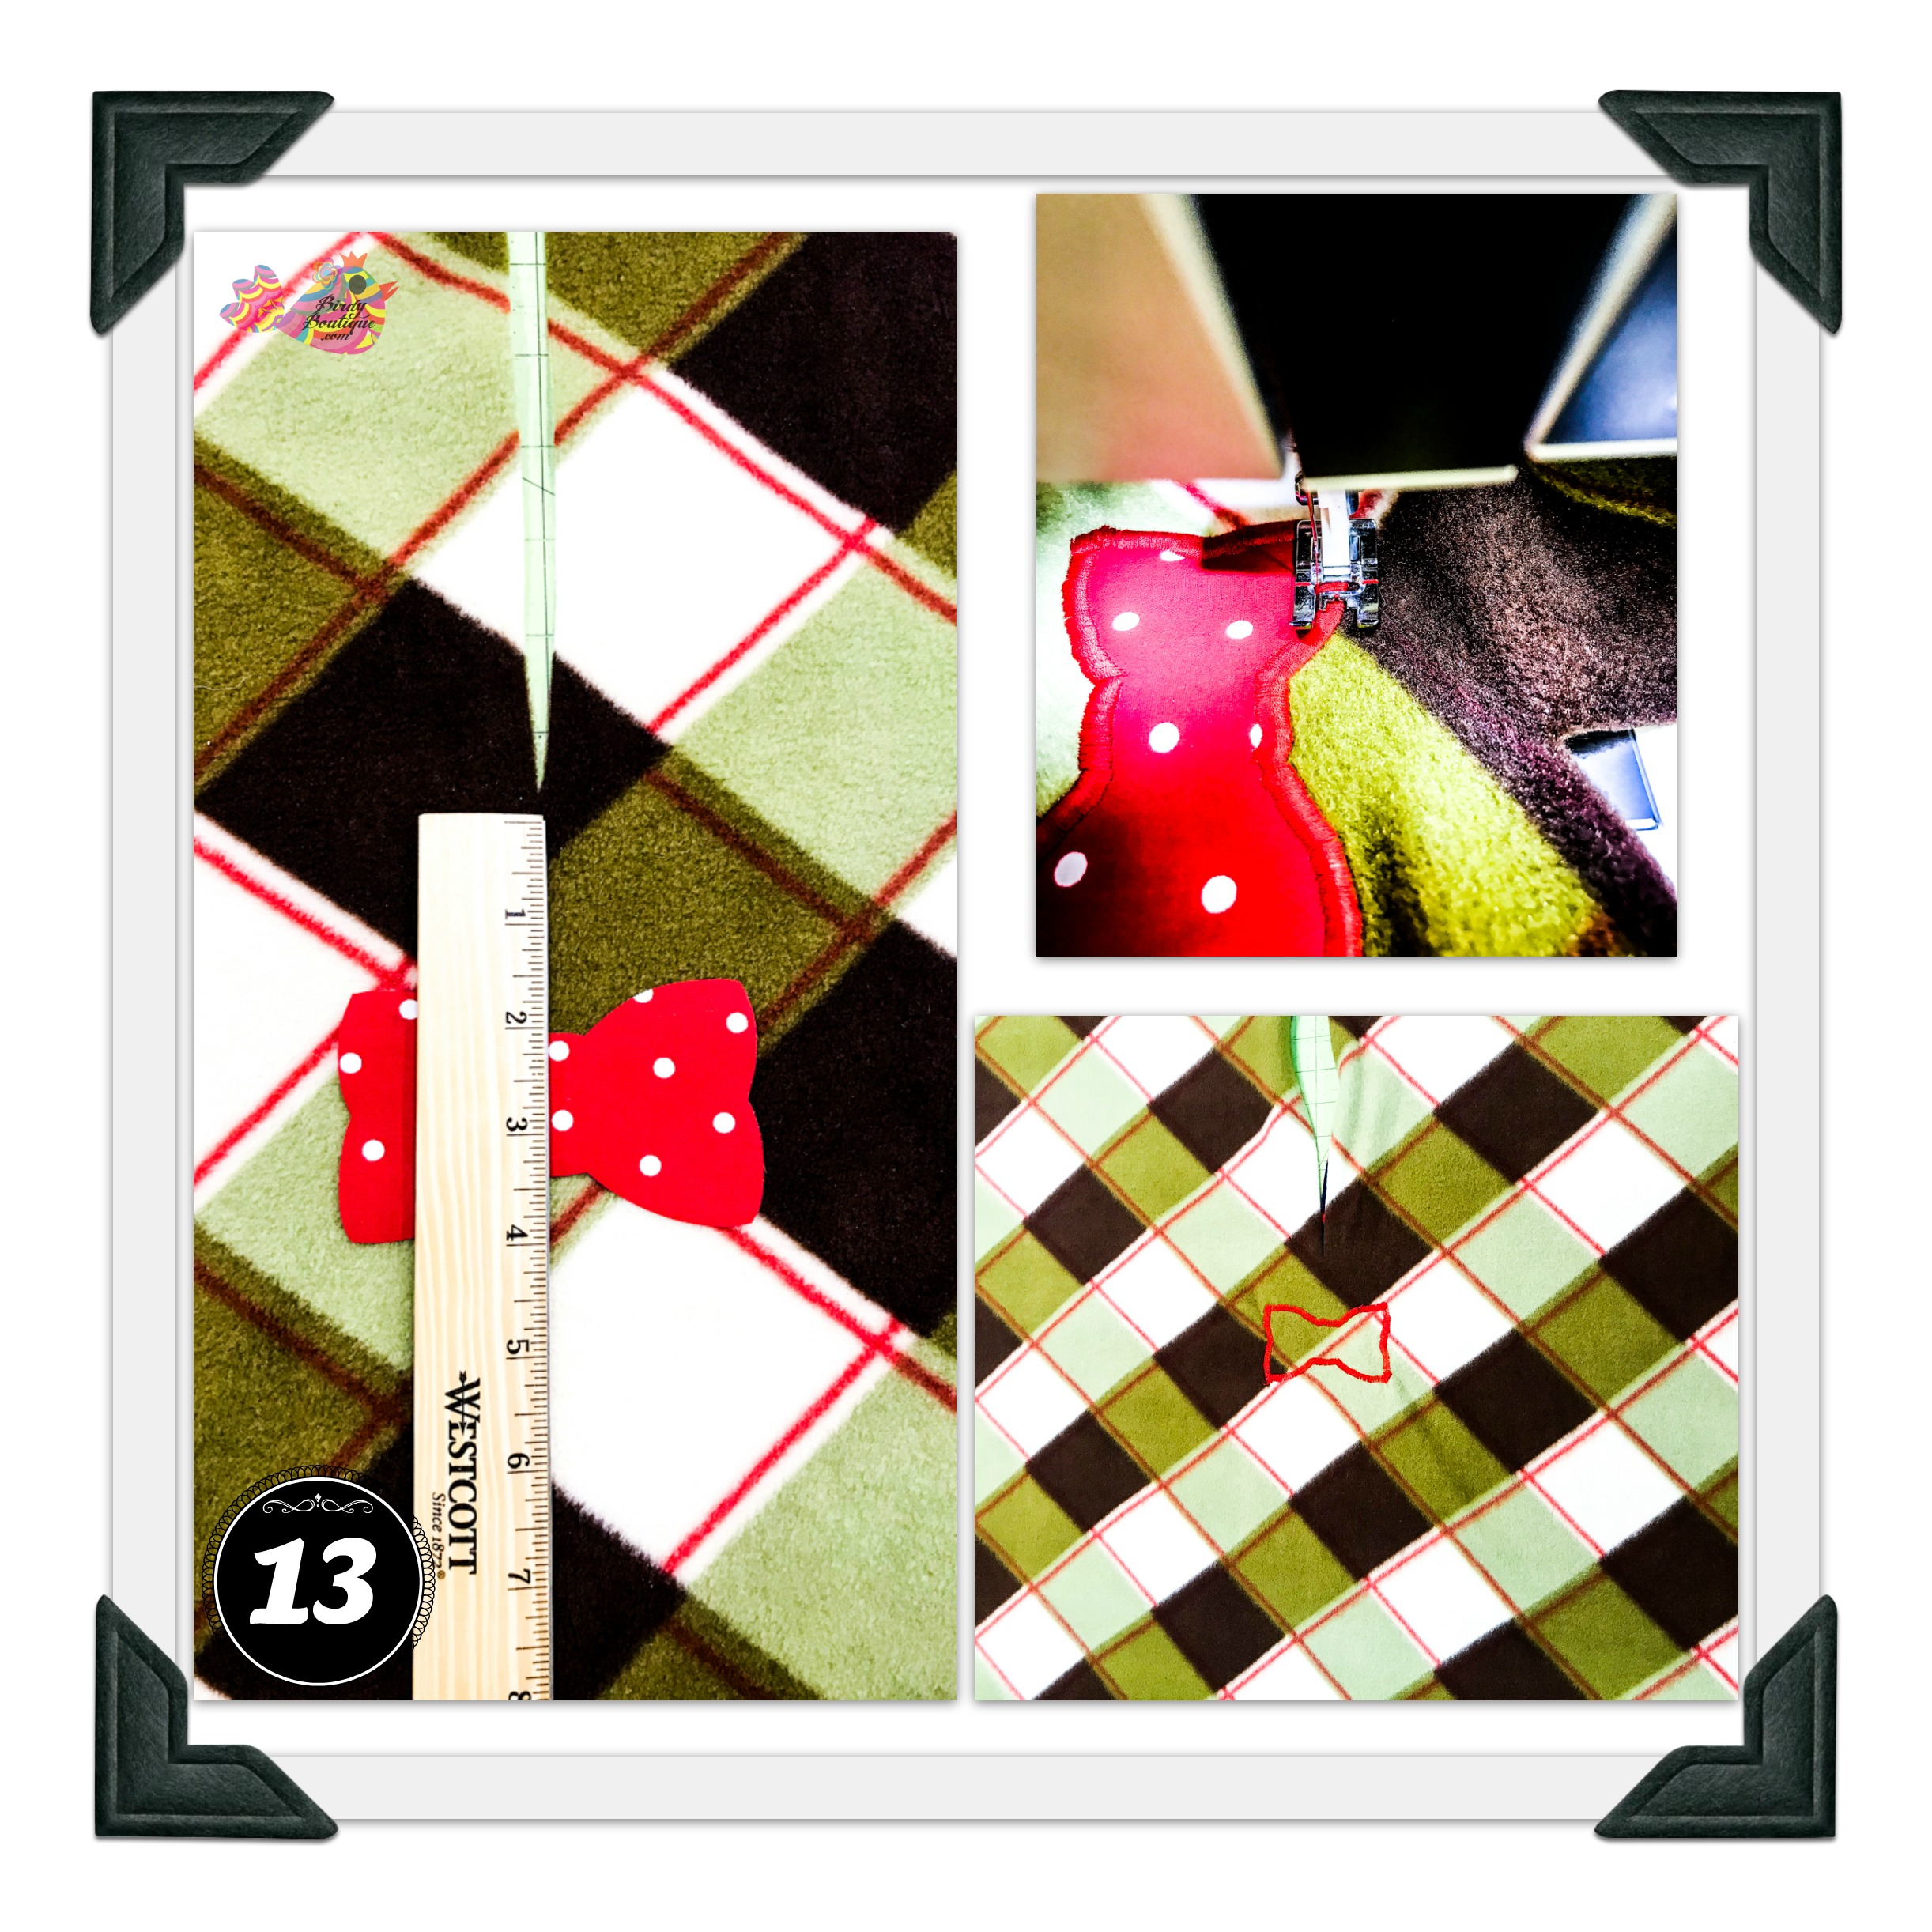
STEP 13. Decorative applique. Print a shape of a bow tie, neck tie, or whatever you prefer on paper. Download our pattern here. Cut it out. Place the shape onto your fabric of choice. I used 100% cotton but stabilized it first with an iron on stabilizer. I gently pressed the shape onto the poncho body piece through a piece of cotton. MAKE SURE THAT YOU PLACE THE APPLIQUE ON THE RIGHT SIDE OF THE FLEECE, 2-3 inches below the hood opening. You have to be super careful here as you can melt the fleece; use a warm iron and a piece of cotton as a barrier just to adhere the applique slightly. You can also skip this step and just pin down the applique. Now use a satin stitch, or whatever stitch makes you happy, and sew around the applique. GO BACK TO STEP 5 to continue with making of poncho.
We Want to Hear From You!
Please share your creations with us! We hope that you enjoyed making this project and came up with some great fleece combo ideas! The possibilities are endless; think baby shower gift, kids birthday gift, Christmas gift, etc. Which patterns and print combinations will inspire you?
Thank you so much for pinning and sharing your inspo. How were these directions? What would you like to see a tutorial for next; a circular or rectangular poncho, a no sew tie knot version, adult hooded blanket, etc.? Please tag us on social media or send us photos of your proud work. Feel free to ask us any questions below; we are happy to help!
PS, if you are not a DIY-er (or tried and it wasn’t for you), these car seat poncho options here are available for purchase directly from us. Happy Sewing and thanks for visiting!

More Easy DIY Sewing Tutorials
We hope you enjoyed our tutorial! If you’re interested in learning to make similar ponchos in different ways, take a look at these step by step tutorials we found for you! All of them are free and easy to follow. It’s all about sharing, right? Have other ideas, contact us here.
- Make this fleece-lined hooded car seat poncho tutorial has a cute double layered look.
- These 12 adorable DIY coat tutorials for the entire family are a must see.
- DIY a carseat poncho using a cd for pattern help with a hood option.
- 5 great additional tutorials for making a car seat poncho including no sew, zipper up and crochet.
- The end frills are cute on this sew your own car seat poncho directions tutorial!
Of course, you can also check out Pinterest for tons of car seat poncho tutorial pins!

- Benefits of Weighted Blanket Therapy: How & Why? - July 29, 2021
- 20 Non Candy Easter Basket Filler Gift Play Ideas for Easter 2020 - March 2, 2020
- Top Tips for Toddler Road Trips & Flight Ideas - October 27, 2019
hello, thank you so much for these directions. I am unable to get the Hood PDF to download. Could you email to me? dklombard@sbcglobal.net
Karen, you are welcome! We know you will love sewing a car seat poncho! We hope to see how it turned out for you.
I love this tutorial. When I click on the hood pattern I get nothing. Am I doing something wrong. I would like to be able to print it out. Thank you
Check it out now 🙂
I’m confused as to where the slit for hood should be? 7 inches from very top? 7 inches from middle? Please advise
From the top 🙂
Also interested in the answers to the above questions about the Hood PDF and where the slit should be.
I couldn’t get the pattern to download either. Can you email it to me?
Thanks,
Deb
I love this tutorial. When I click on the hood pattern I get nothing. Am I doing something wrong. I would like to be able to print it out. Thank you
The hood pdf won’t open for me can you please email to me
Thank you
Pam
I cannot get the hood pattern to download could you email it to me.
Hi! I can’t get the hood link to work either!
Clicking on any of the “download PDF here” links just reloads the same page I started with!
Can you send me the PDF?
I am also unable to open the hood pdf. Could you send it to me as well kristinforbes17@yahoo.com
Hi, Very good idea and tutorial. Would you please e-mail me the hood pattern? Thank you.
I am also having the same problem. Would love to download the hood template but when I click on the link nothing happens. Help? (and thank you for the tutorial!!)
You are welcome Lisa, our car seat poncho tutorial is easy to use! https://blog.birdyboutique.com/contact-us/ fill this out and we can email you the pattern.
I enjoyed this tutorial, but a picture of how to measure for the hood slit might be helpful. I didn’t include a hood in the one I made (I’m making a beanie to match instead), but am having trouble understanding what “from the top” means. 🙂
It may have hit spam, contact us here and we can reply: https://blog.birdyboutique.com/contact-us/